PCB Basics
PCB Basics and Troubleshooting
PCB Basics
Building a keyboard for the first time can be overwhelming. In this guide, we are going to go over the basics of what is generally considered to be the most complex part of a keyboard kit: The PCB.
Overview
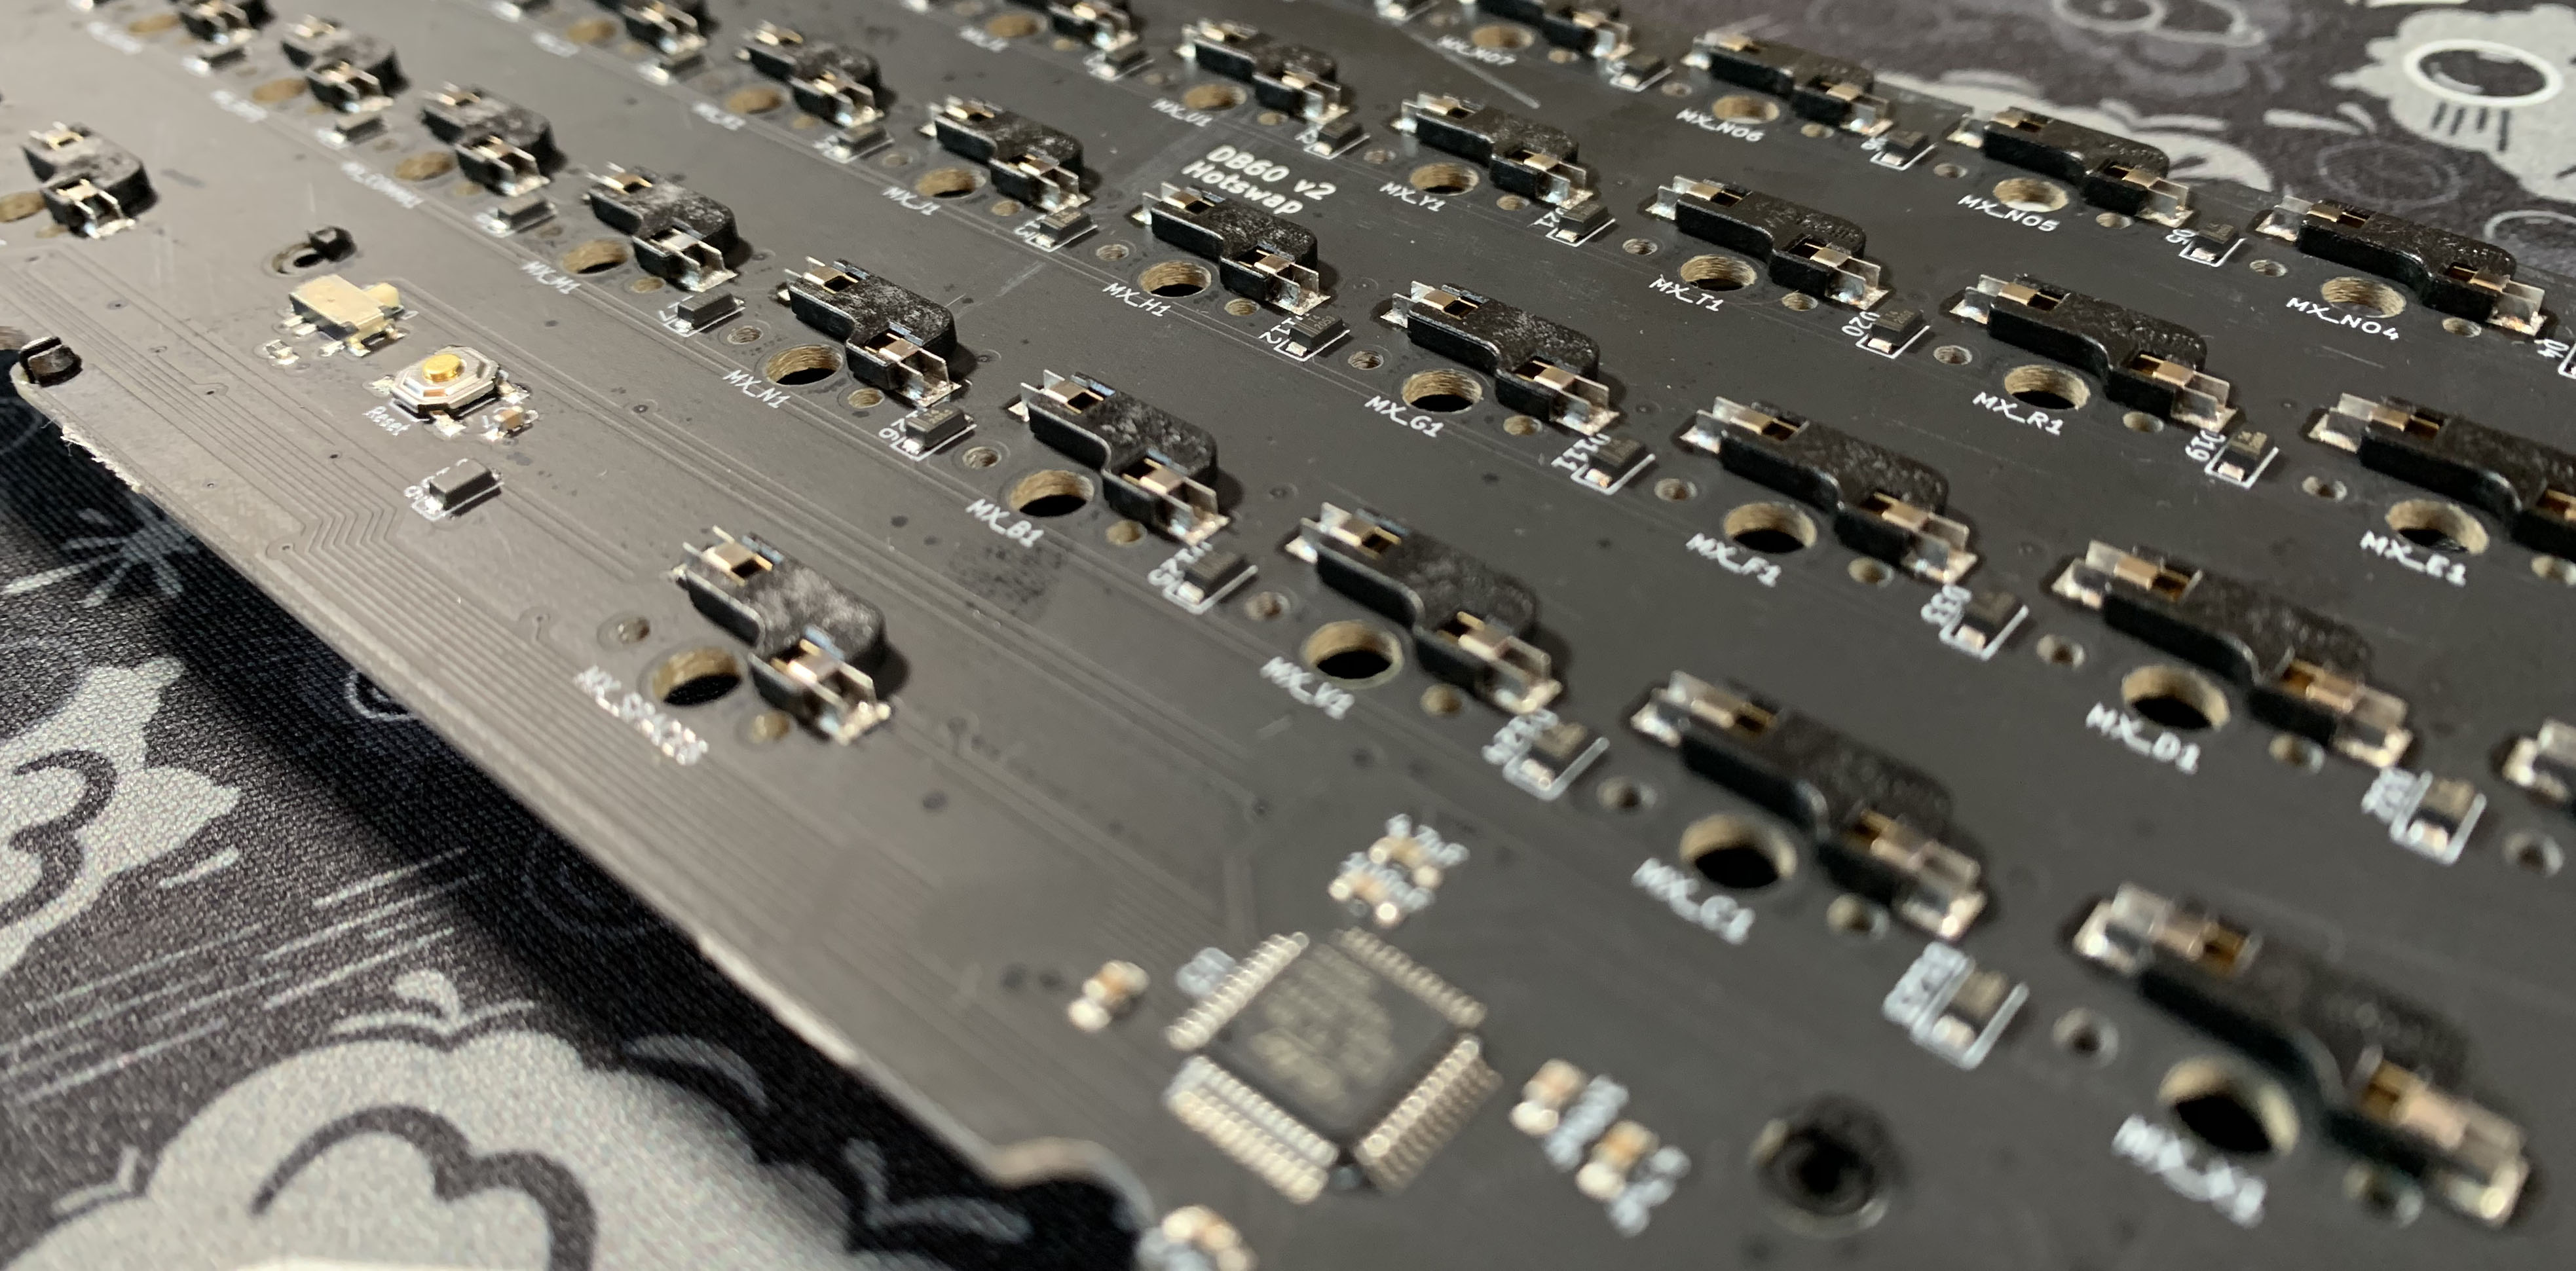
There are a handful of major components to a PCB. Not all PCBs will have each of these.
- Switch cutouts
- One large cutout for the middle of the switch.
- Two smaller cutouts for alignment pins.
- Two small cutouts for the metal pins.
-
LED cutouts
- One negative, and one positive hole, where LEDs can be
soldered in.
- 2 holes/contacts are needed for single color LEDs.
- One negative, and one positive hole, where LEDs can be
soldered in.
-
Diodes - Makes sure current flows in the correct direction.
-
Resistors - Controls the current flowing through them.
-
MCU - The brains of the PCB.
-
Trace - Act as wires, to guide the current.
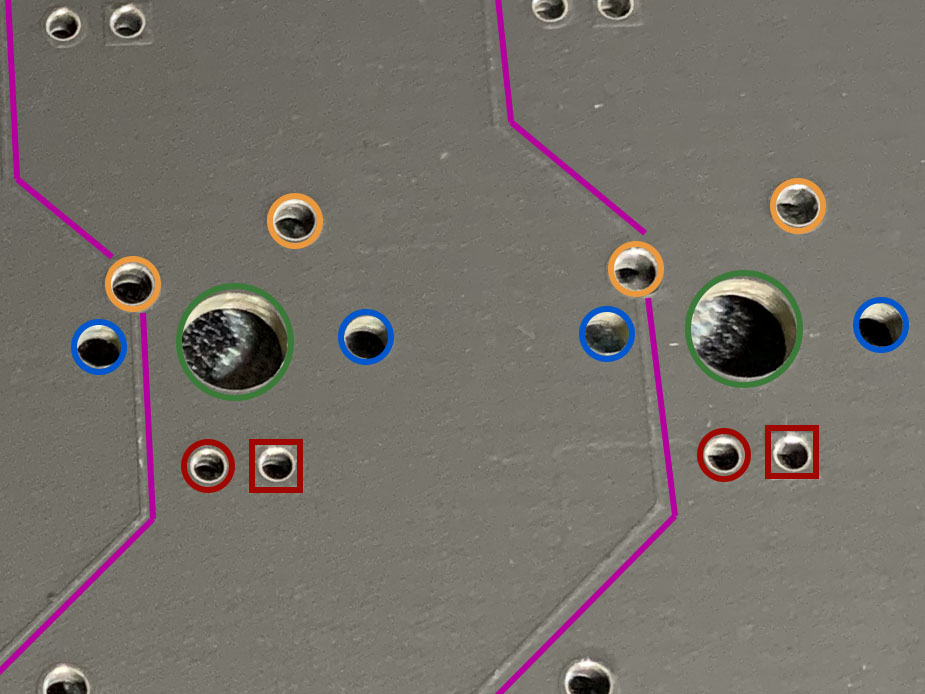
- Color guide
- Orange: where metal switch pins are inserted
- Blue: where switch alignment pins are inserted
- Green: where the large middle bump on bottom of switch is inserted
- Pink: Trace path
- Red: Where LED pins are inserted (generally square is negative, circle is positive)
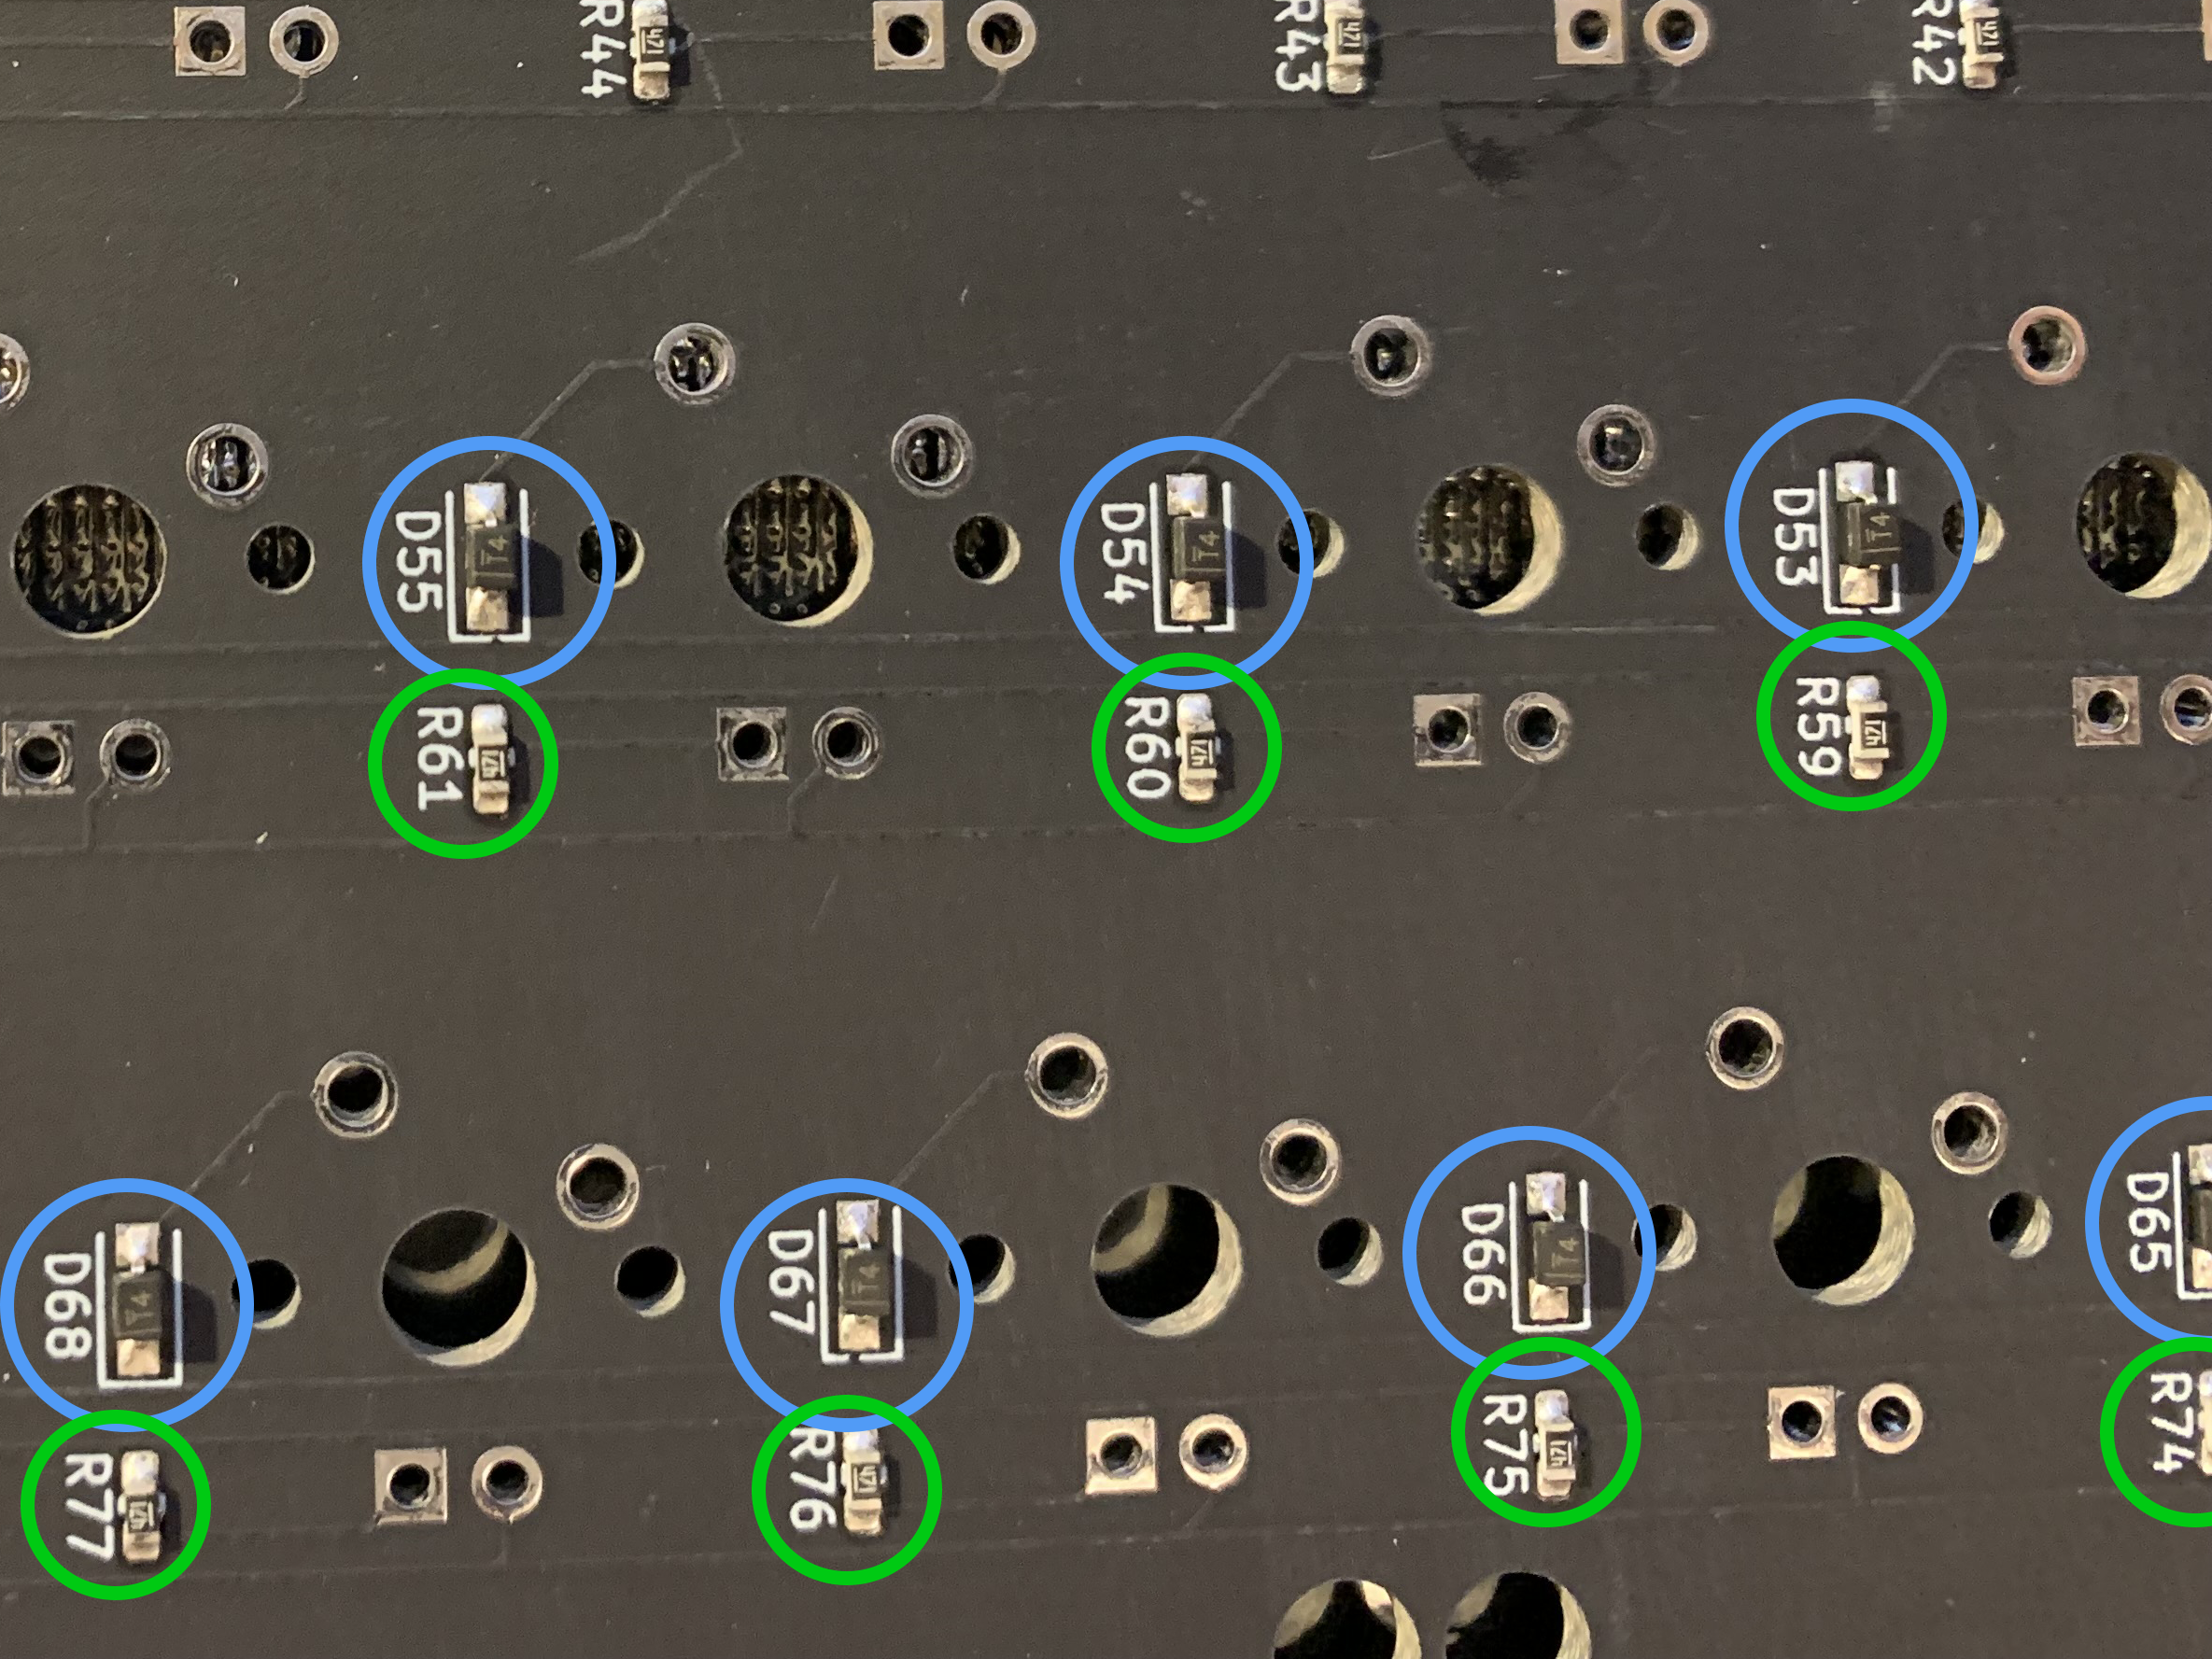
- Color guide
- Blue circle: Diode
- Green circle: Resistor
Testing a PCB
Regardless of manufacturer, price, or experience, it is always recommended to test your PCB before doing anything else. This is commonly done by shorting (connecting) the two switch pin pads using metal tweezers. It is recommended to use a keyboard tester while doing this, to make sure everything is triggering correctly. If you’re using VIA, there is a keytester built-in.
Note
Not all keys will show up in keytesters. Layer keys will not show up. Occasionally due to your OS settings, the windows key might not show up as well.

Soldering a PCB
We won’t get too in depth here, but here are some quick bullets to help you understand the basics.
Note
Here is a lovely guide that covers most of the basics, as well as potential errors.
-
Temperature is important. It’s recommended to start at a lower temperature like 550F when learning, then move up to a higher temperature once you have more experience.
-
The solder you use is also important. It is highly recommended to choose a leaded solder with rosin, the diameter is up to you.
- Here is an example of what to look for: Kester 63/37 .031” diameter with rosin flux core.
-
Tin your tip before soldering. What this means is applying a little solder to your tip, then clean it off on your sponge. This will help prolong the lifespan of your tip greatly.
-
Before soldering, buy a desolder pump! Mistakes happen, desolder pumps are necessary to fix them most of the time. In fringe cases you will want some solder wick, but for the vast majority of situations, a desolder pump is preferred.