Photon Build Guide
In this guide, we will go through the building process of your brand new Photon Keyboard! If you run into any issues not covered by this guide check out our PCB Troubleshooting guide, and reach out to our support team via the widget found in the bottom right corner of our contact us page if you're still having trouble. If you want to learn more about the Mac/Windows toggle switch and wireless BT functionality, check out our Photon User Guide.
Getting Started
Before we start the build, make sure you have everything you need to build. While building your Photon, it is highly recommended to build on an anti-static surface and grounding yourself to help avoid static shock.
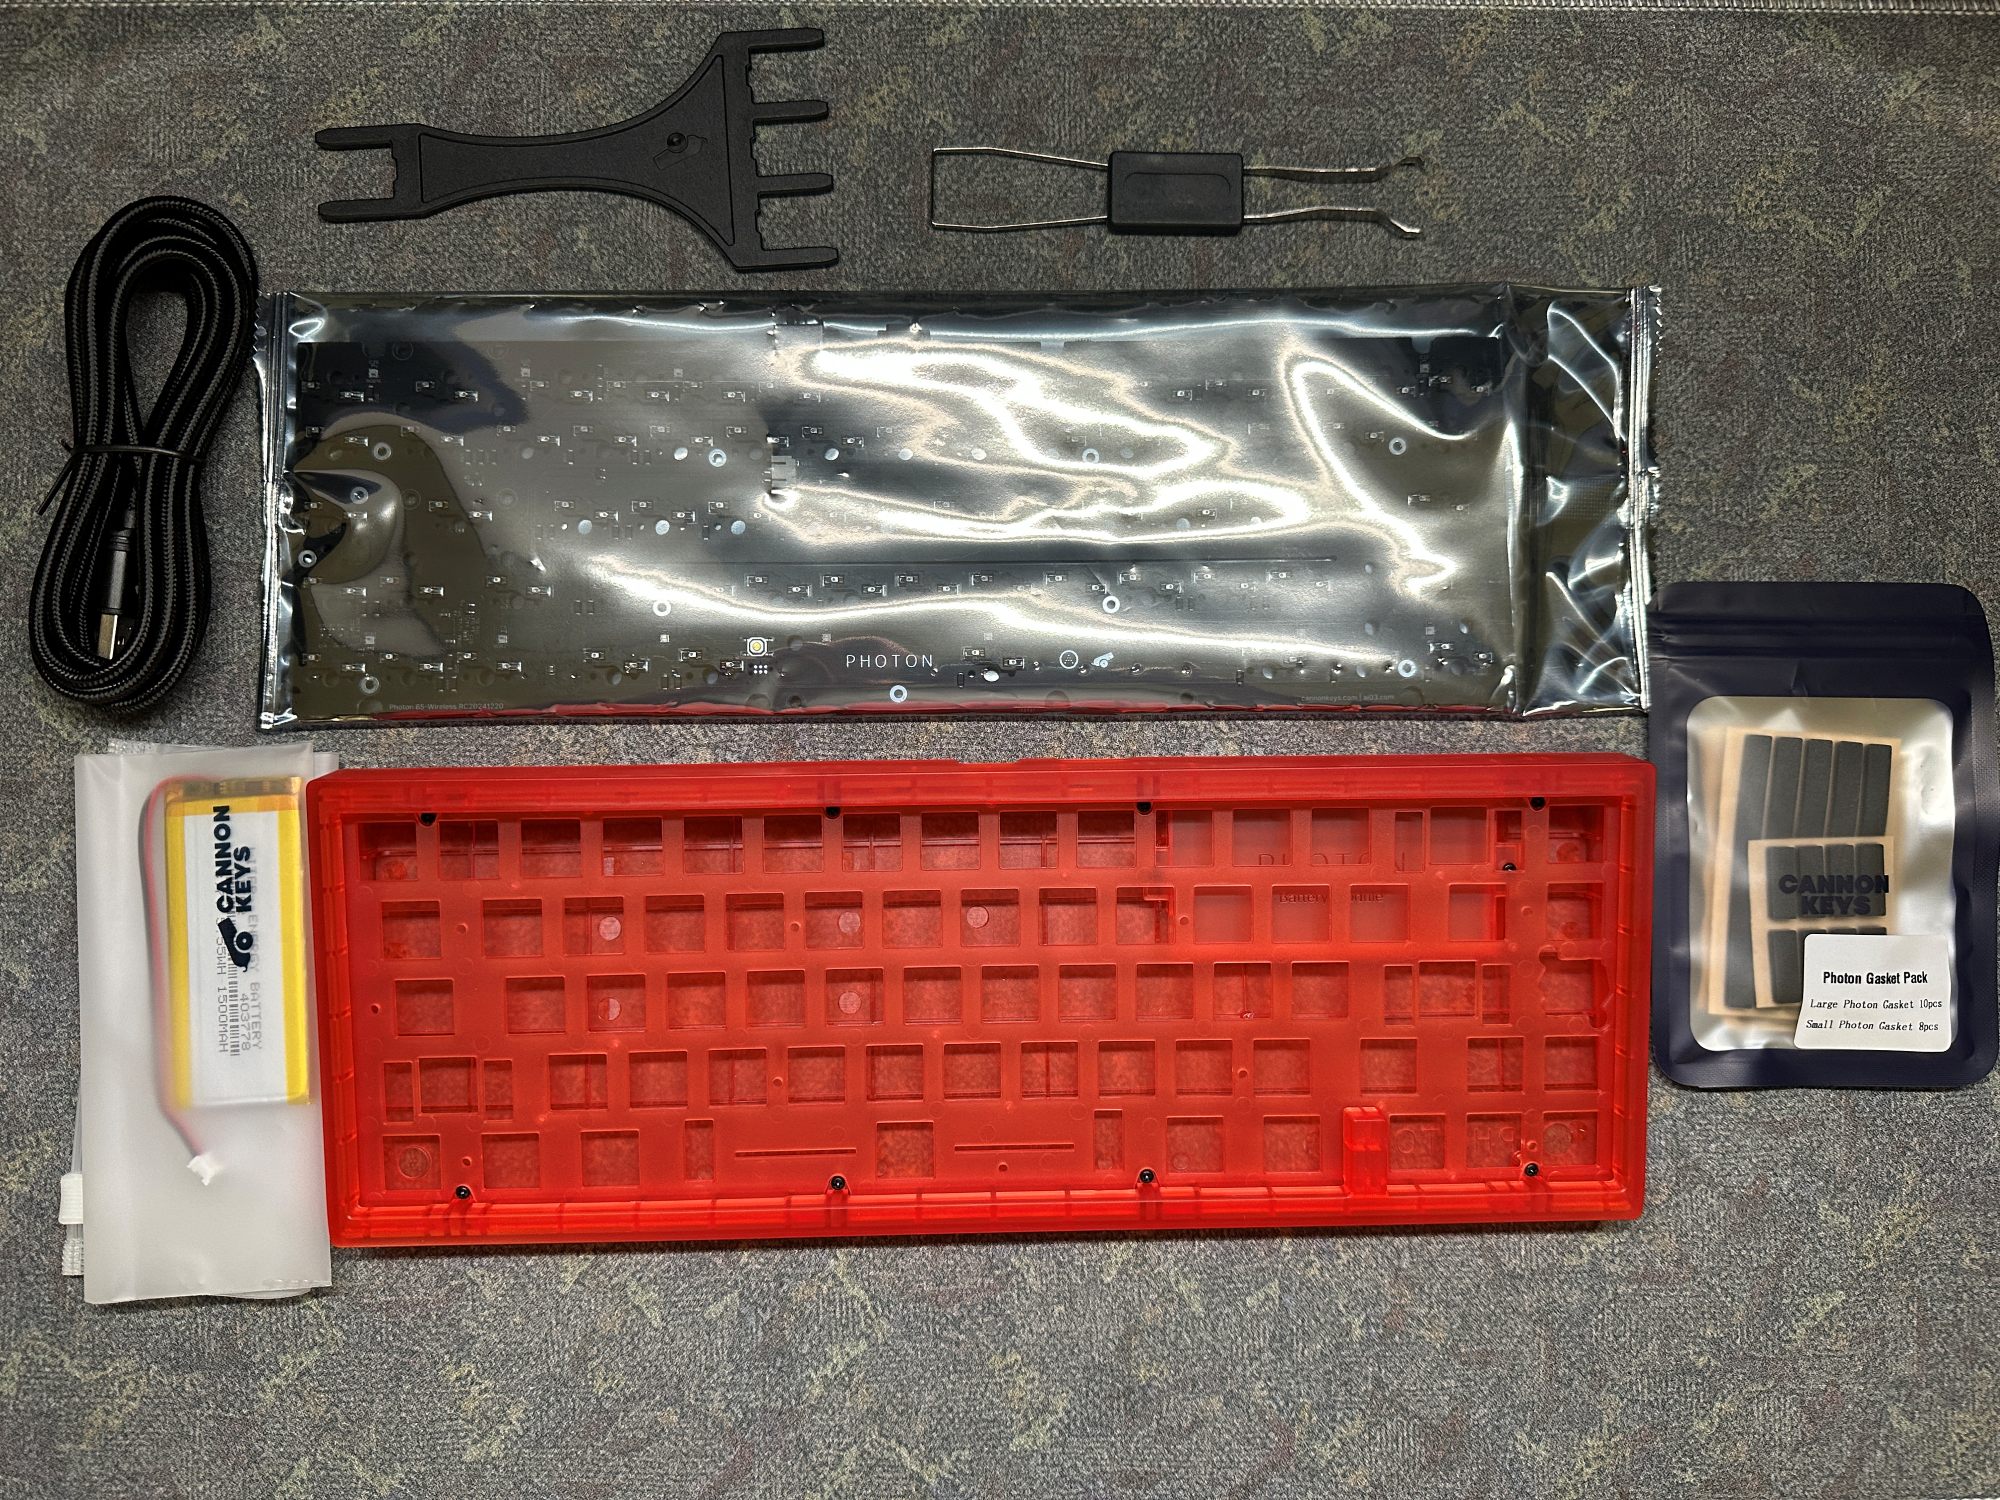
In the box
- Photon top and bottom case with installed battery cover
- PC plate
- PCB
- Installed screws
- Battery (region dependent)
- USB-A to USB-C cable
- 10 long gaskets
- 8 short gaskets
- 4 feet (located in the gasket pack)
- Plate fork
- Switch and keycap puller
If you're missing anything, let our support team know!
Required tools
- Philips screwdriver (While not recommended, a small flathead screwdriver can also work)
Building a Photon
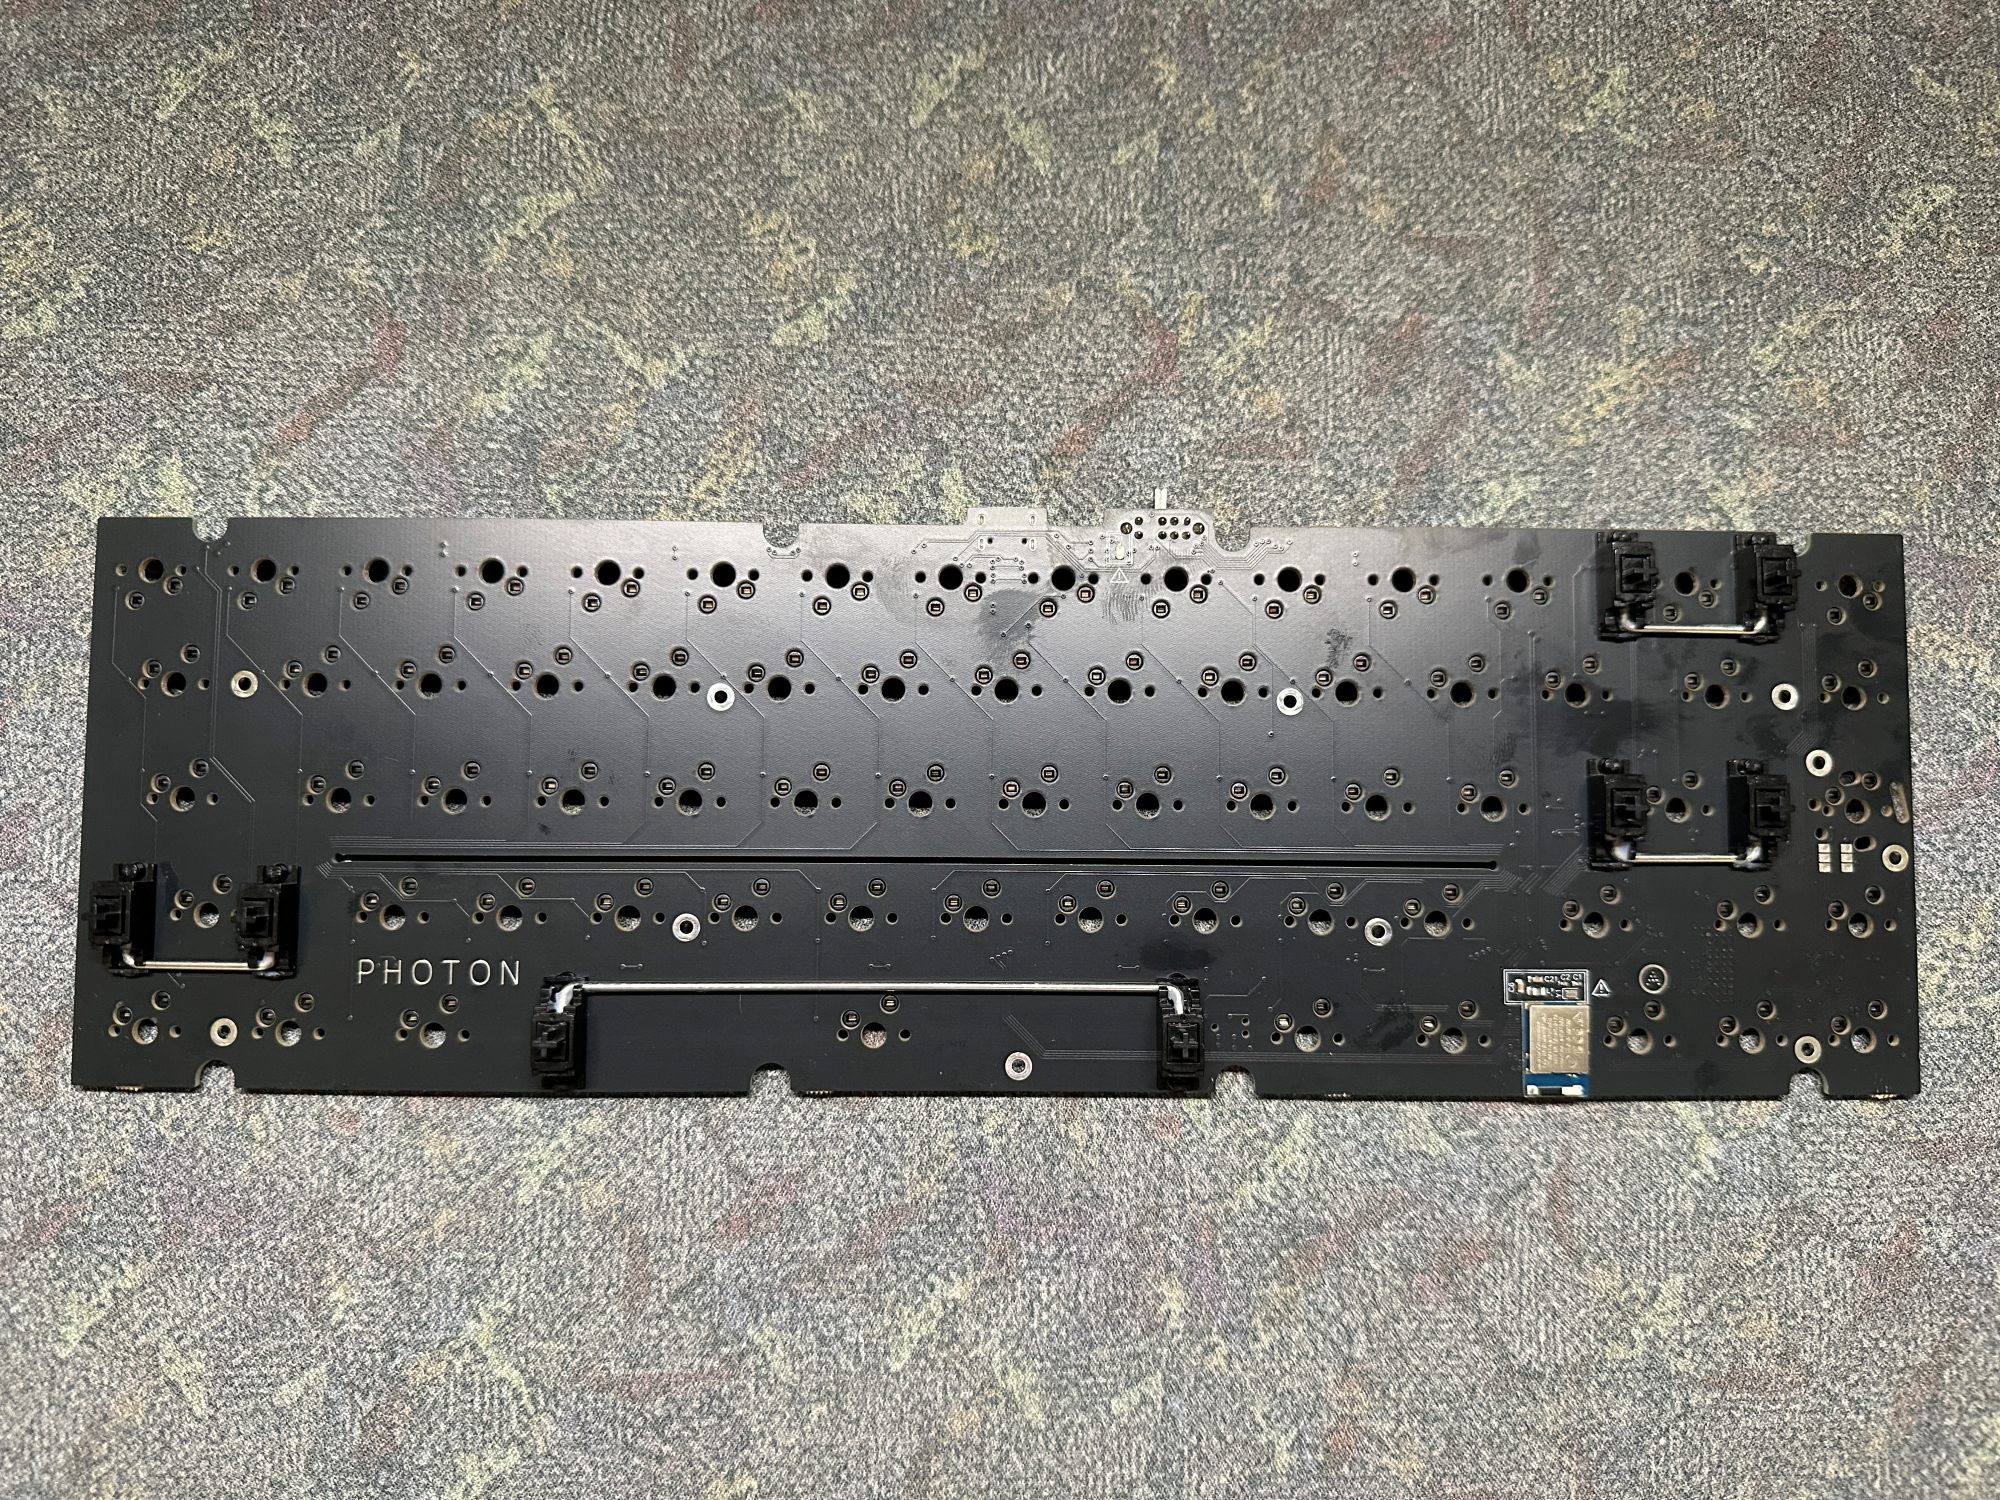
Testing the PCB
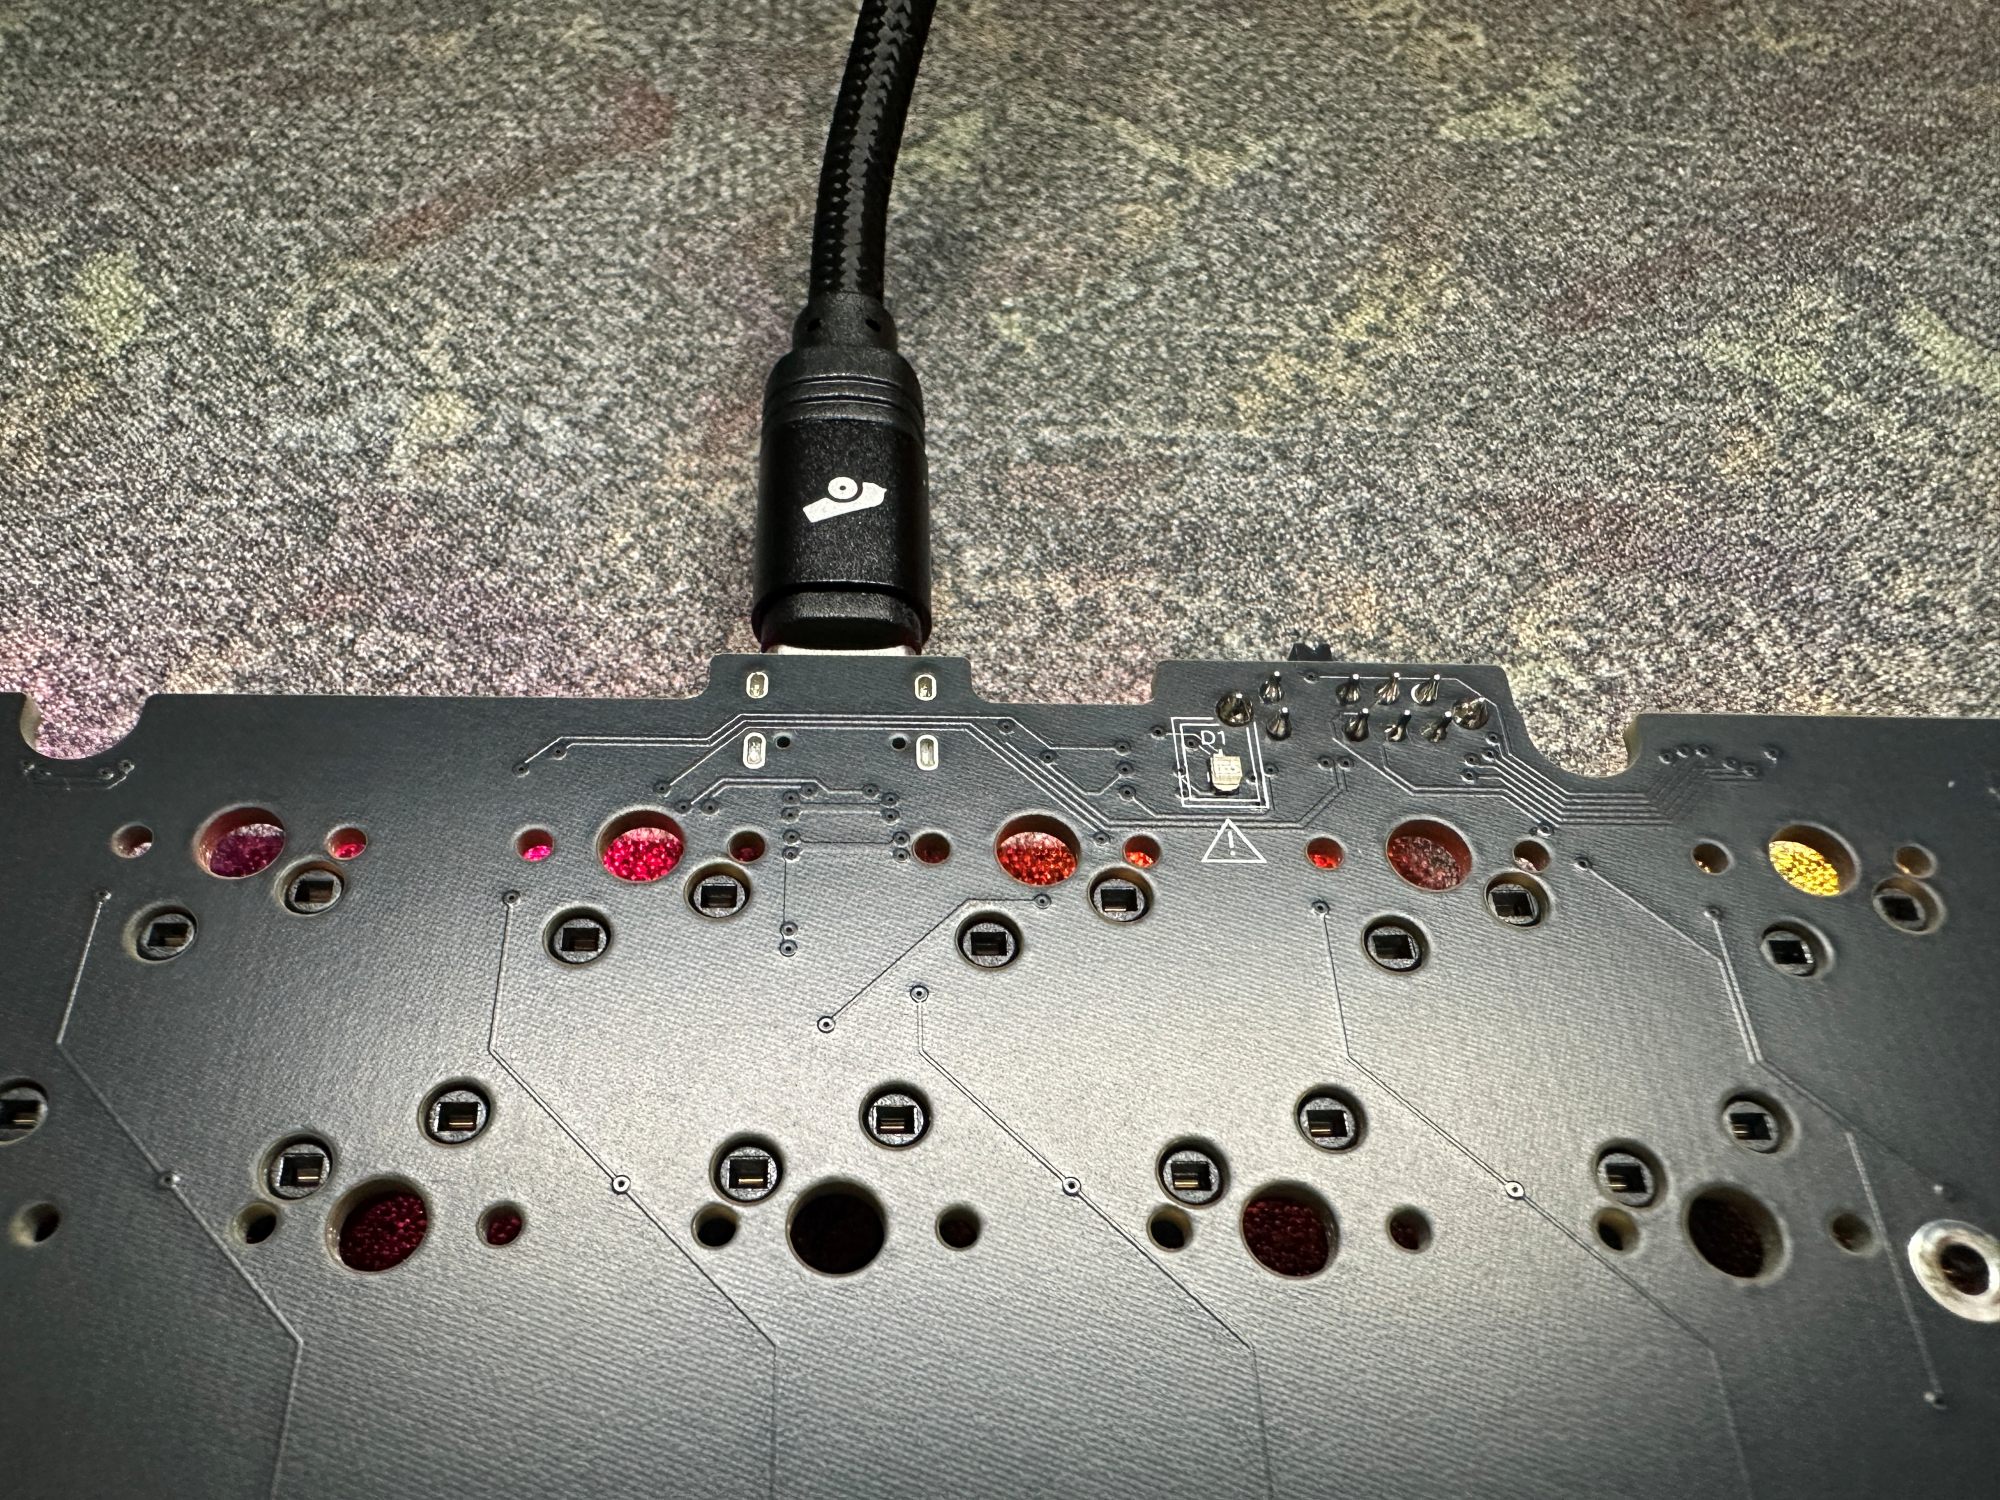
Before building, it is important we test the PCB to make sure it is fully functional. This involves connecting the PCB to your computer, and shorting the sockets with tweezers or a paperclip with a key tester open.
-
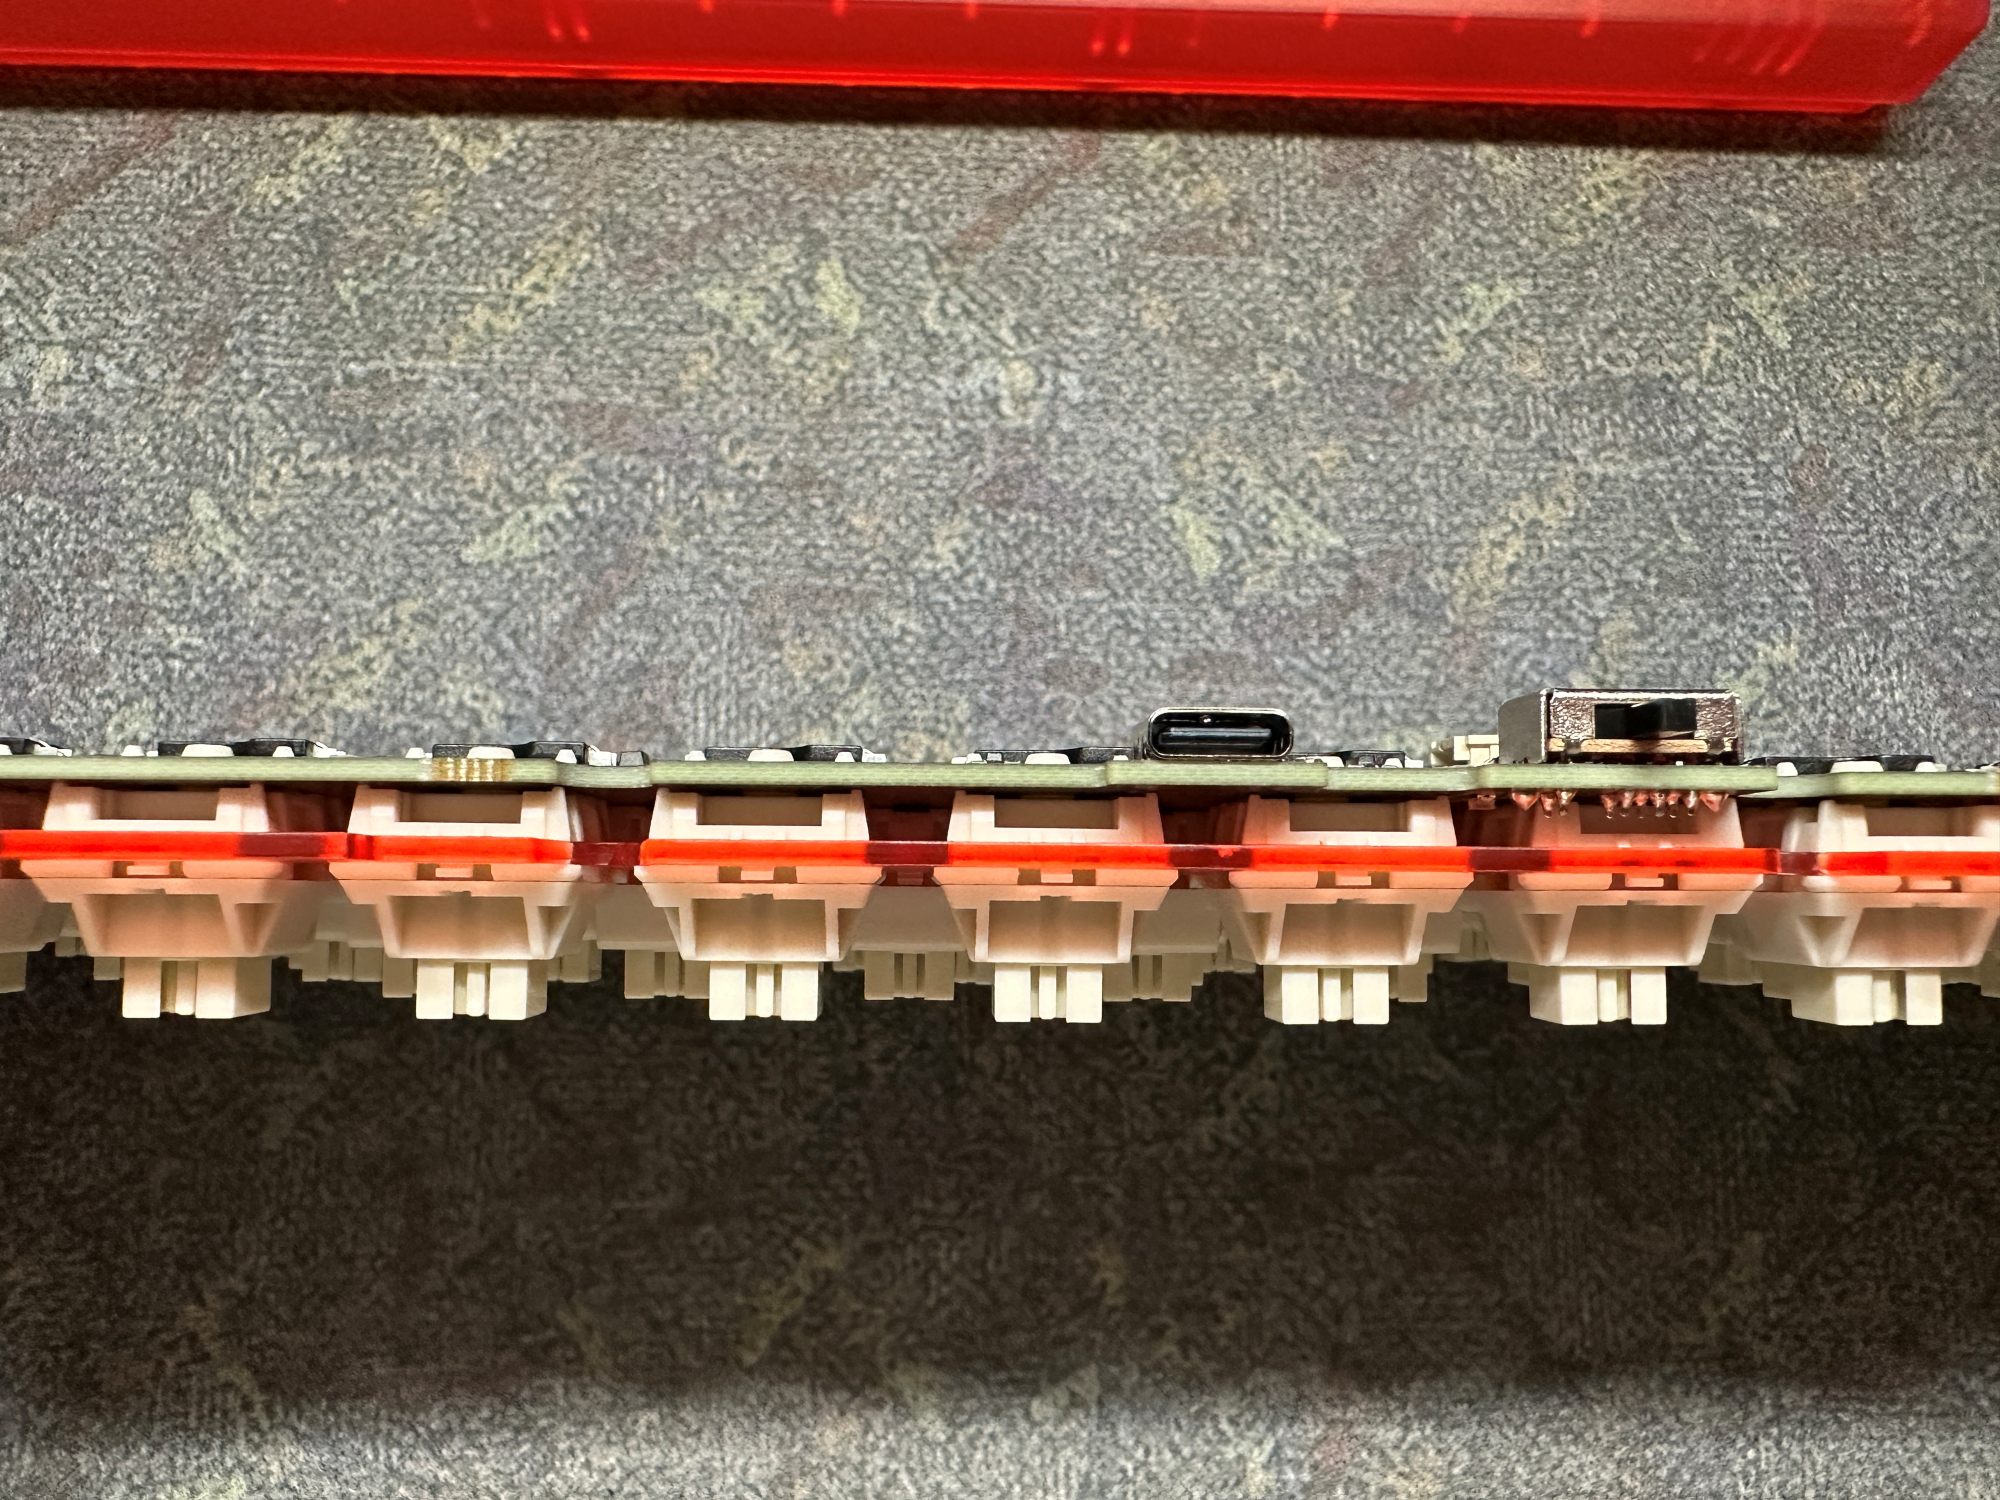
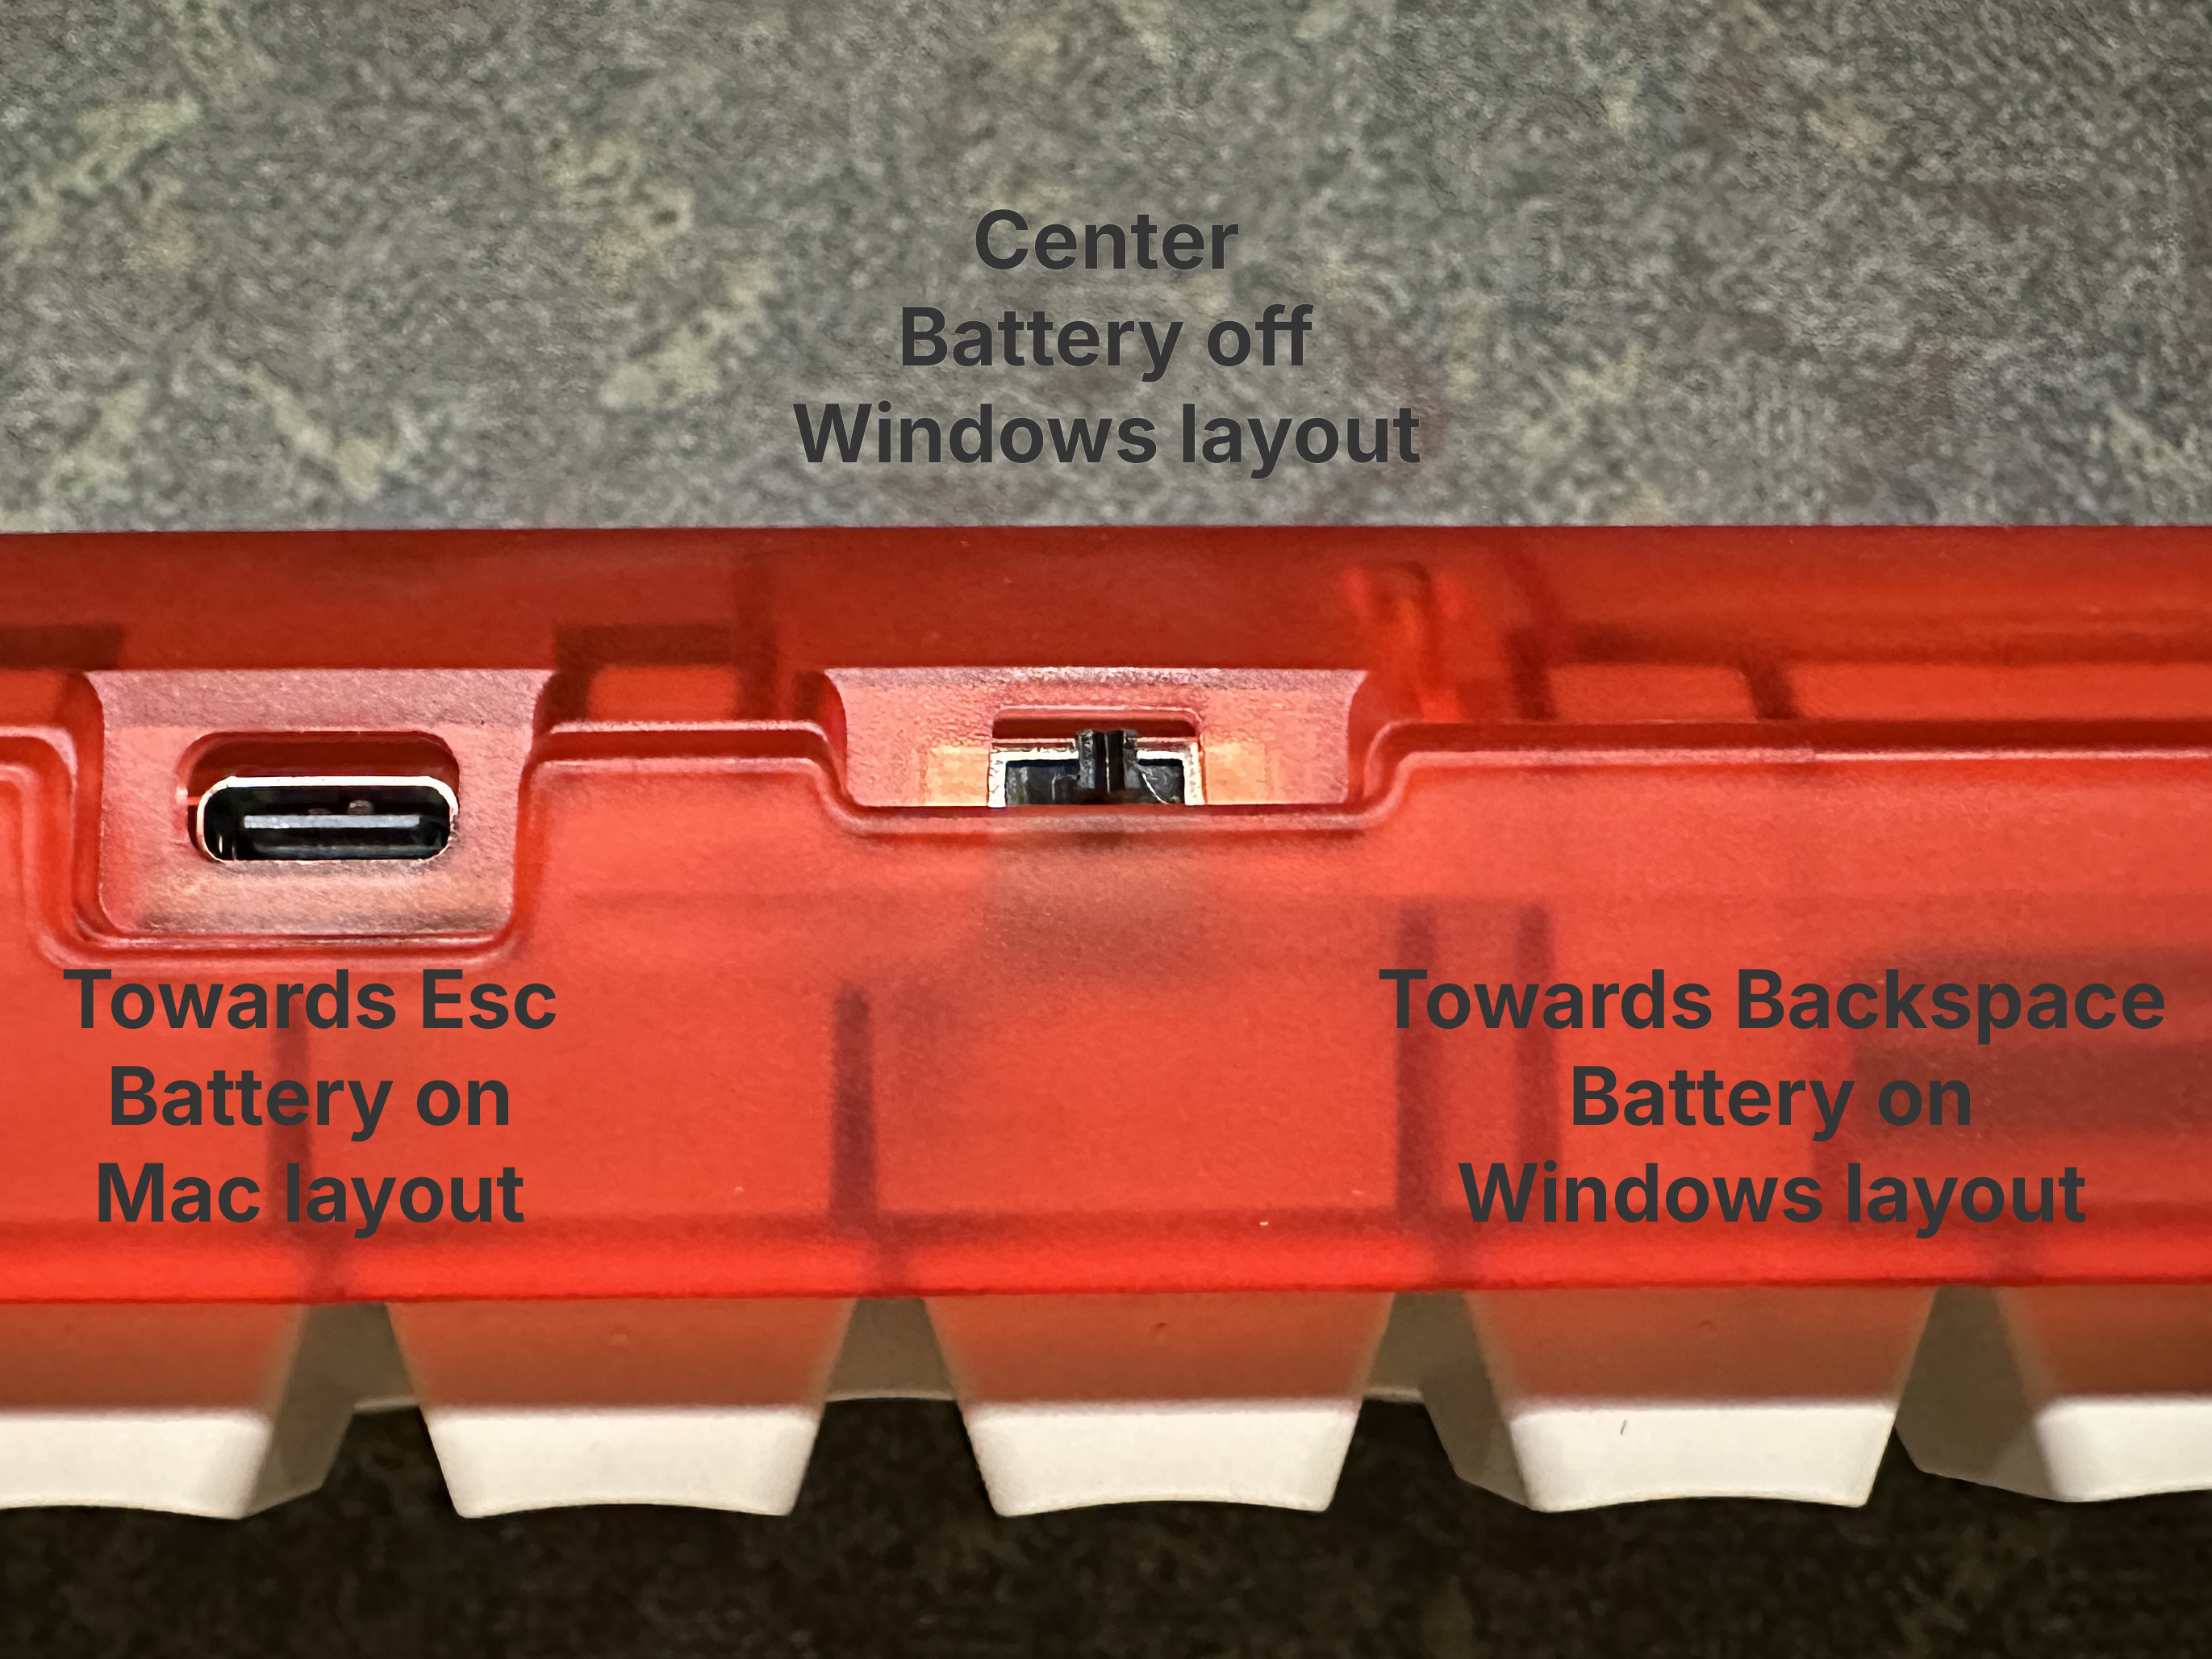
First, plug in the PCB using the included cable and make sure the back switch toggle switch is in the middle position. Even though Photon is a ZMK powered keyboard, you can still use the keytester found on the via web app.
-
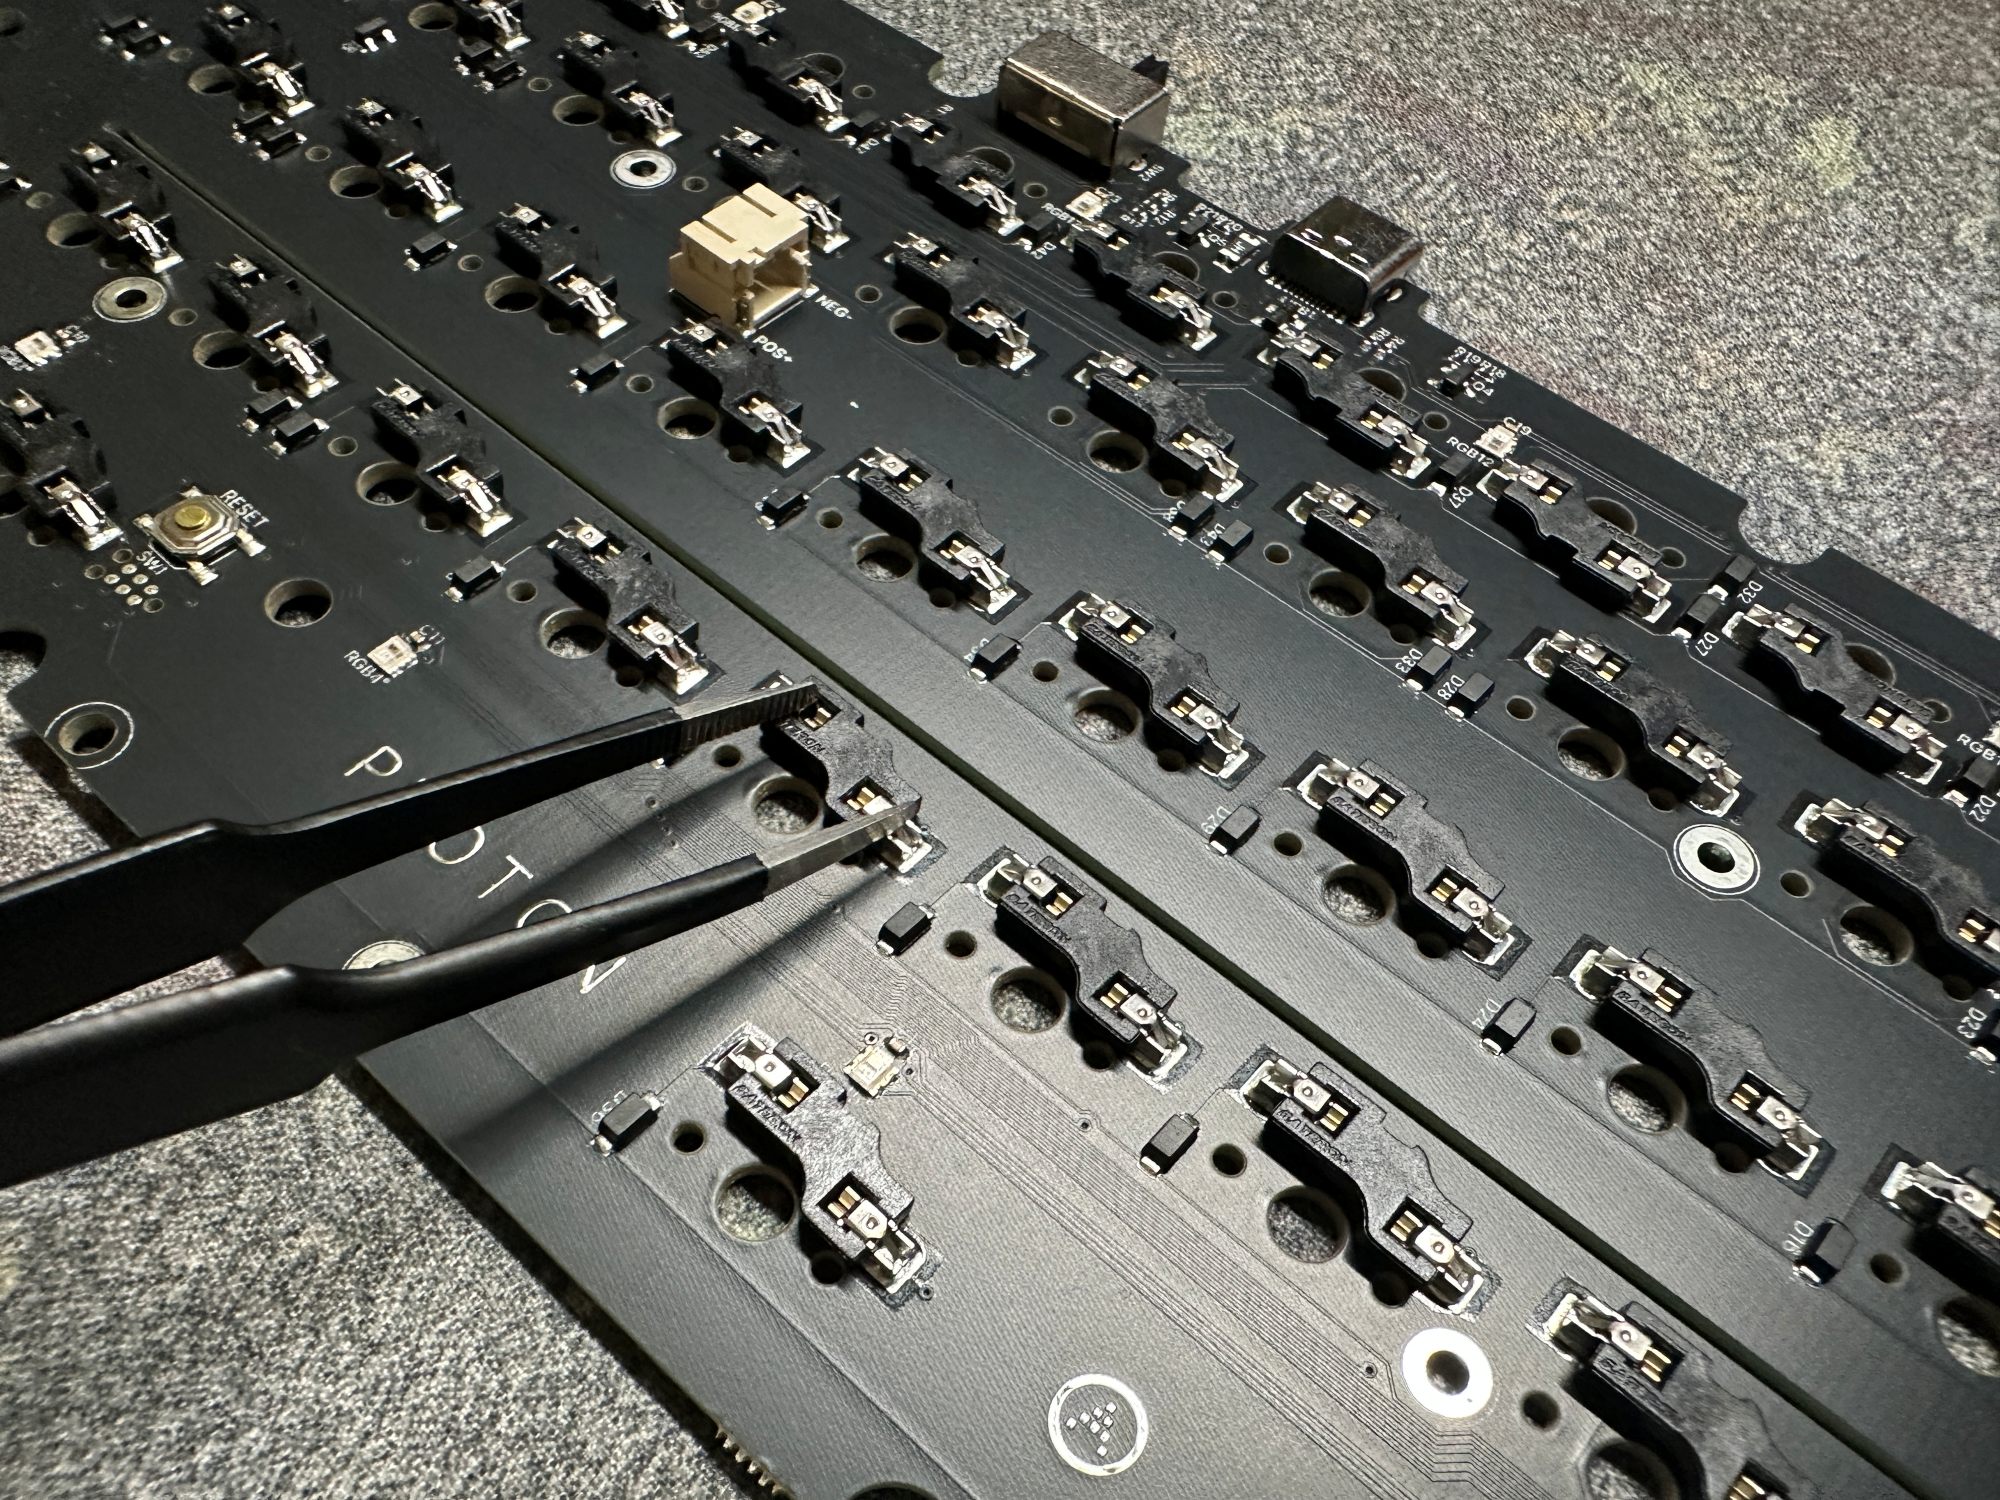
Once connected, navigate to the key tester tab. Using tweezers, bridge the metal pads on the underside of the hotswap sockets to test each switch. If you don't have tweezers, other metal objects such as a bent paperclip or a bit of wire can work. Once you've confirmed each socket is working, you can continue into the next section.
Note
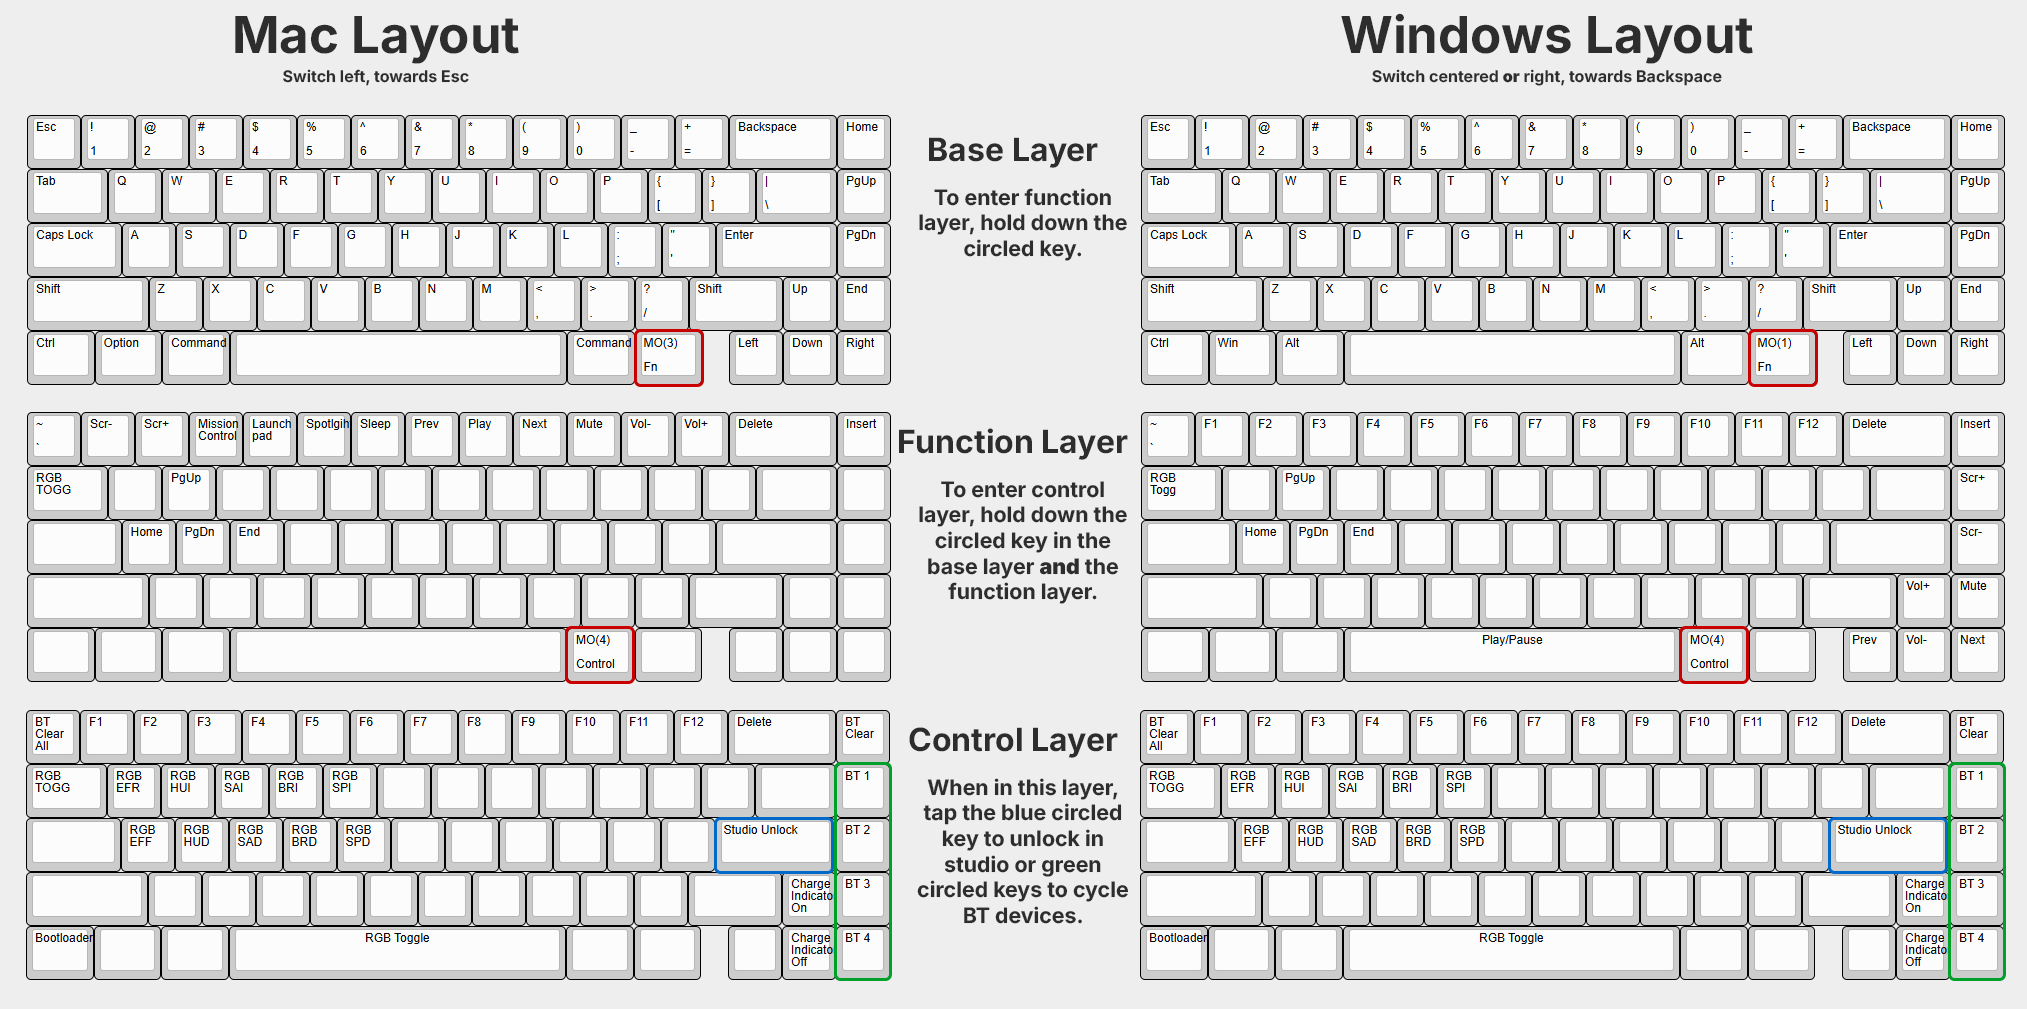
The key two positions right of your spacebar is what is known as a layer key. When testing this key specifically, it will not show up in keytesters. Try holding down this key and the Esc key to type a ` and confirm it is functional.
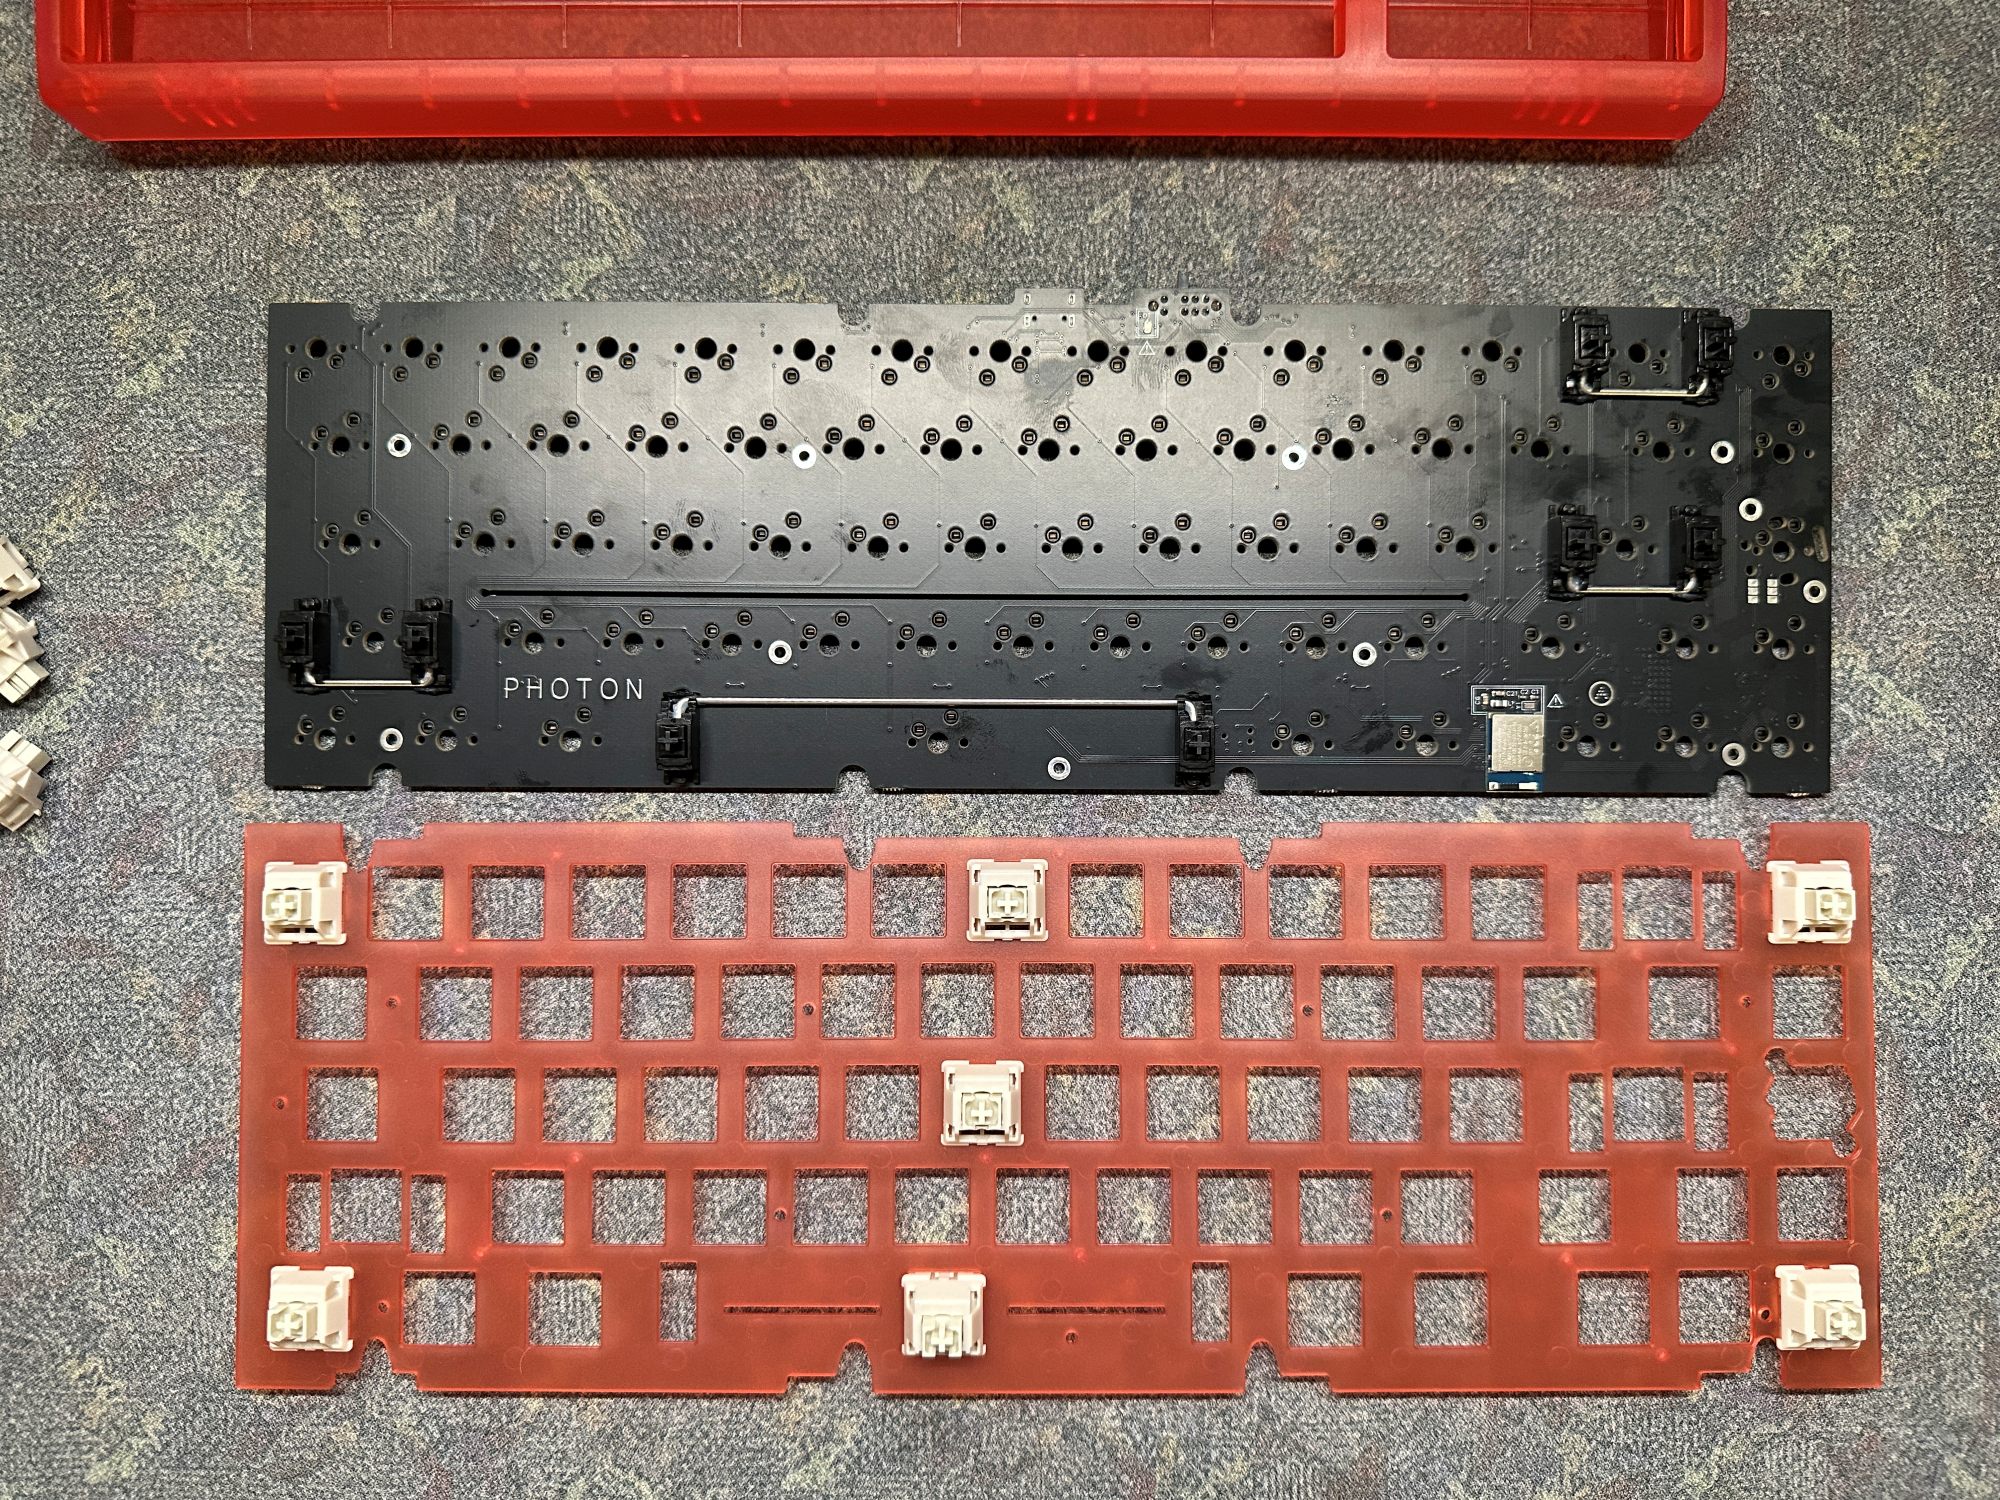
PCB & plate assembly
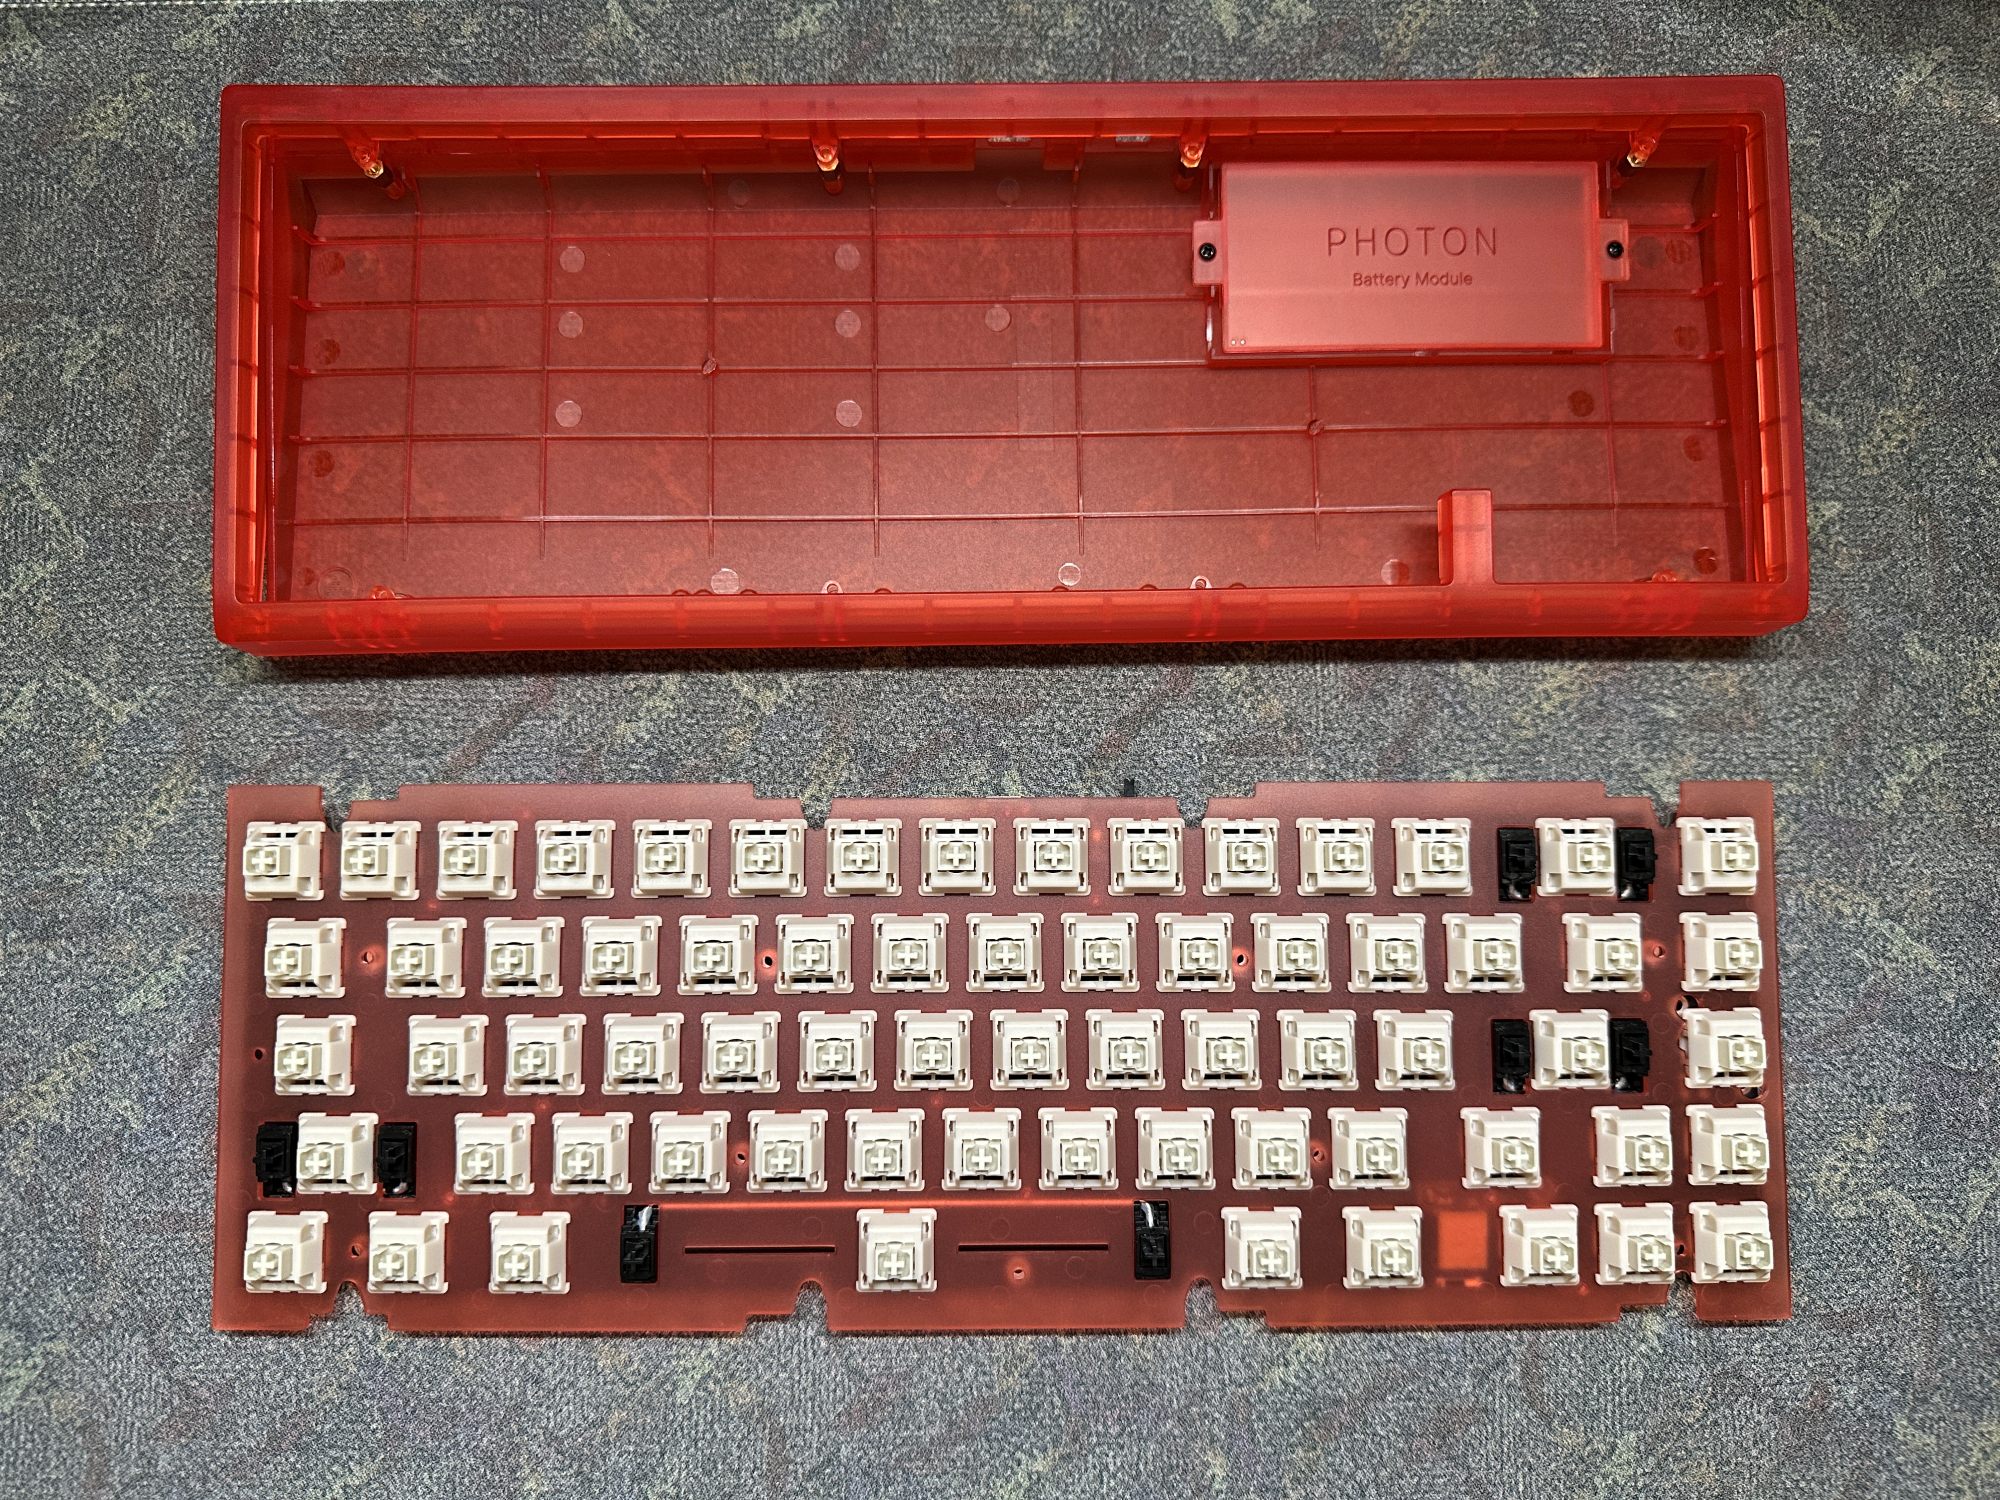
Now that you have confirmed the PCB is functioning properly, you can unplug the PCB and continue with the build! Before starting this section, unscrew the case and remove the plate from the assembly.
-
Assemble your stabilizers, and install them into the PCB. Most stabilizers benefit from lubing, here is a great video on stabilizer modding if you want to learn more. If you need some quick tips on putting stabilizers together, we have some additional information for cherry clip-in stabilizers specifically here. If you are using a knob module, now would be the time to install it using the included hardware.
-
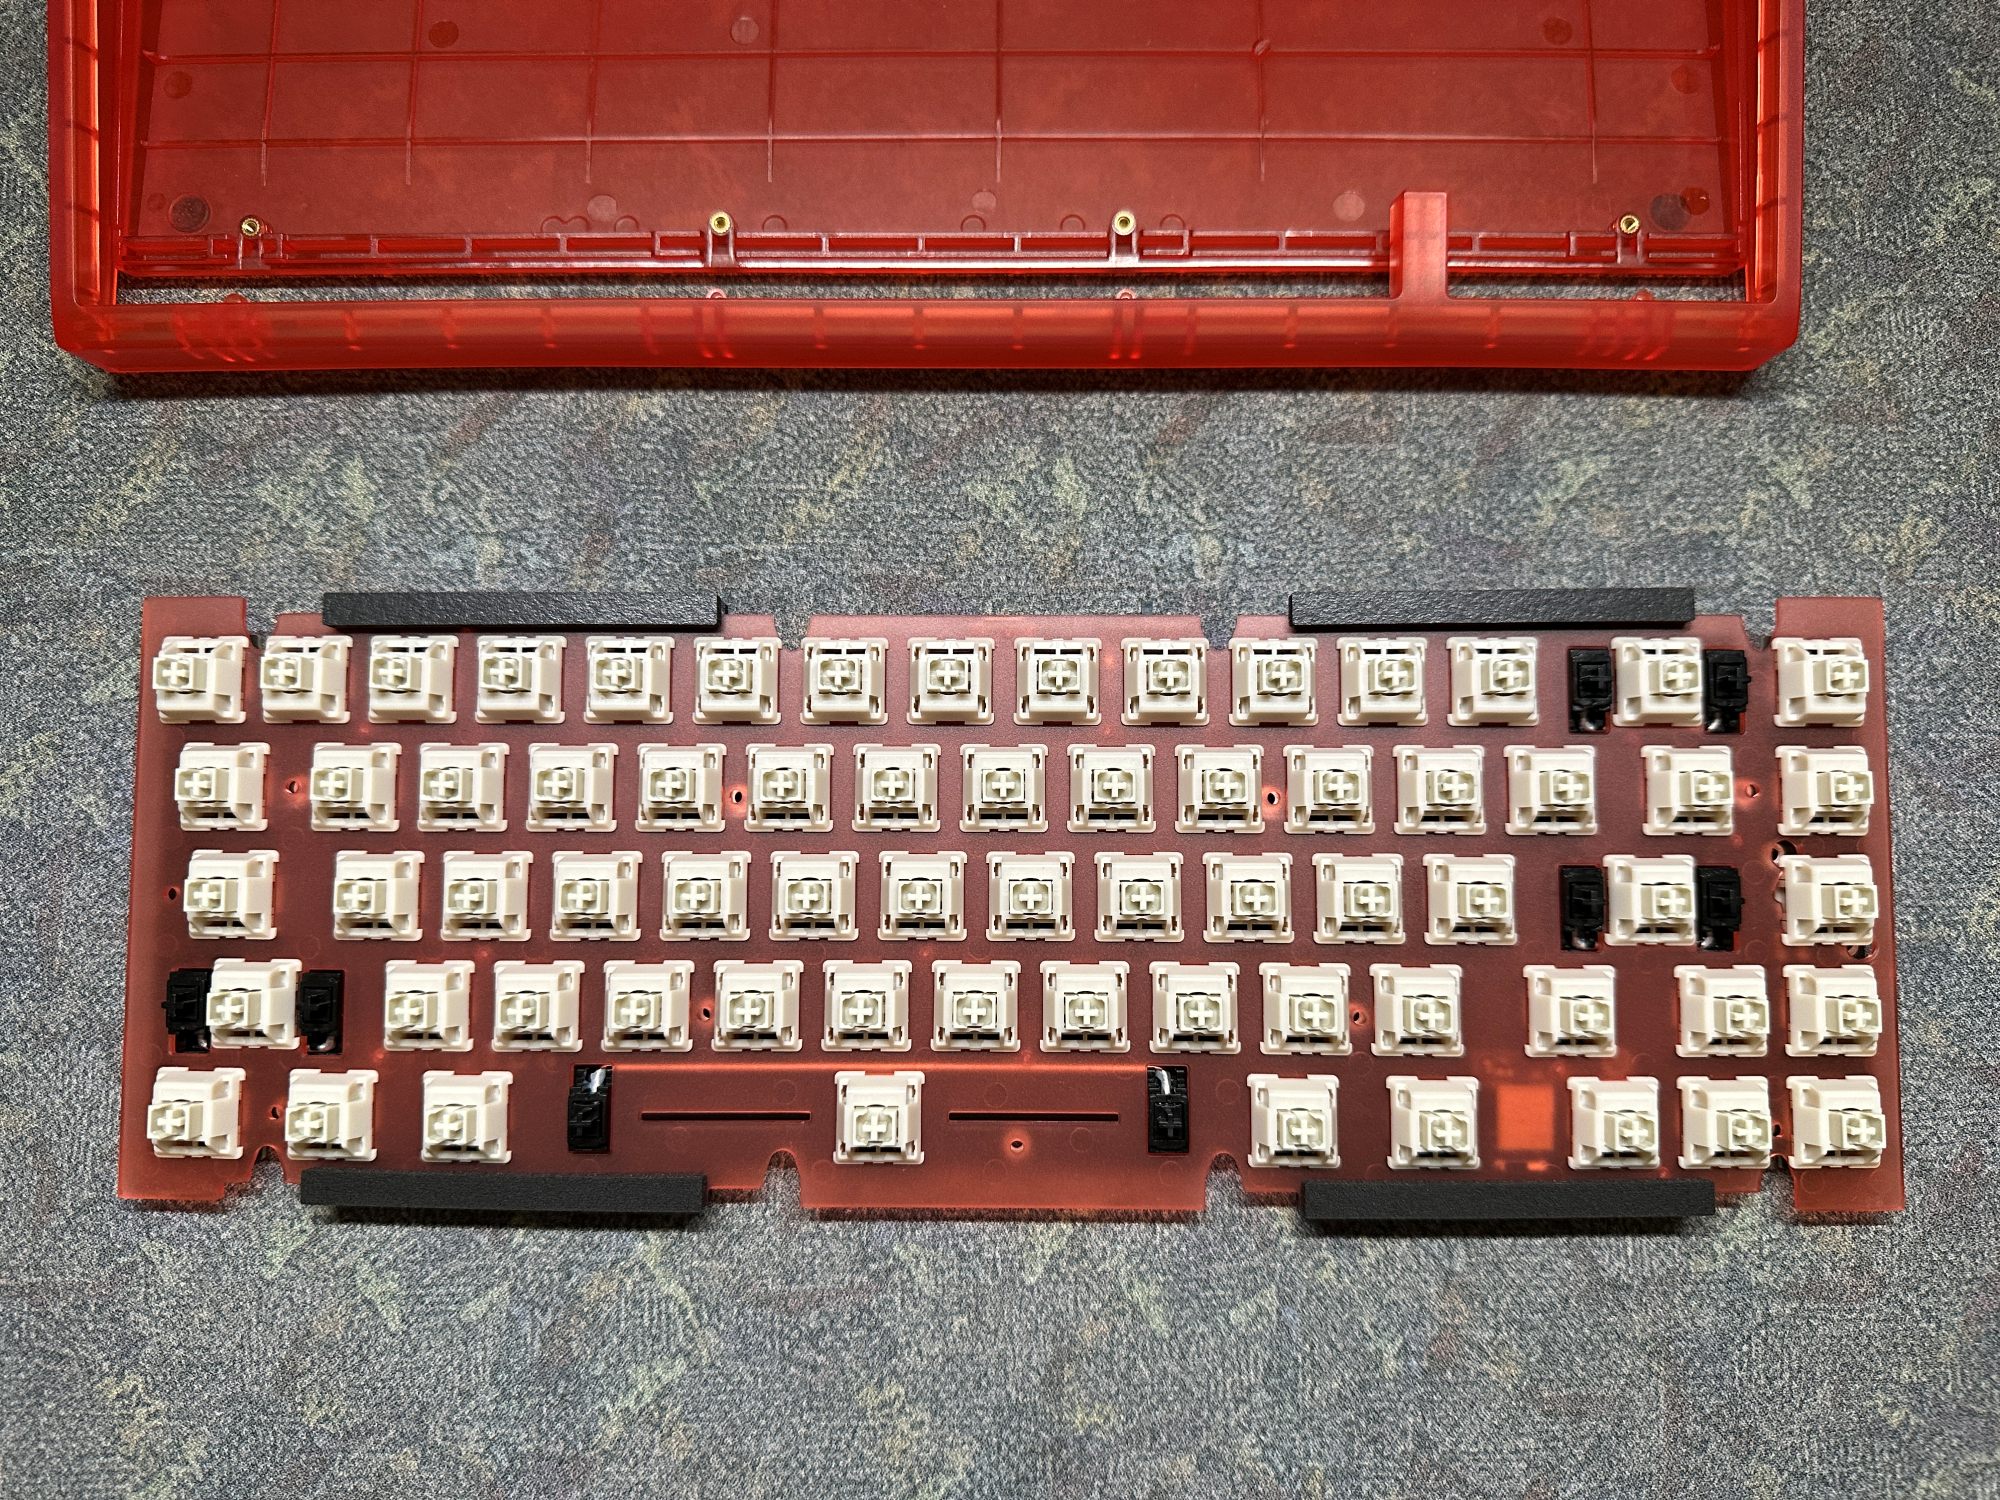
Next up we need to put the switches into the plate and PCB. In this guide we'll go over some tips that should make this process quick and easy! As a general note while doing this, it is very important to always support the backside of the socket while installing switches. If you're using plate foam, lay it on the PCB now before you begin adding switches. Start by inserting switches into the outside and corners. These will help give support while we install the rest of the switches.
Note
The top row of the keyboard uses north facing switches, meaning they will be installed in the reverse orientation compared to the rest of the board. Also, make sure to check your switch pins to ensure they are straight and not bent.
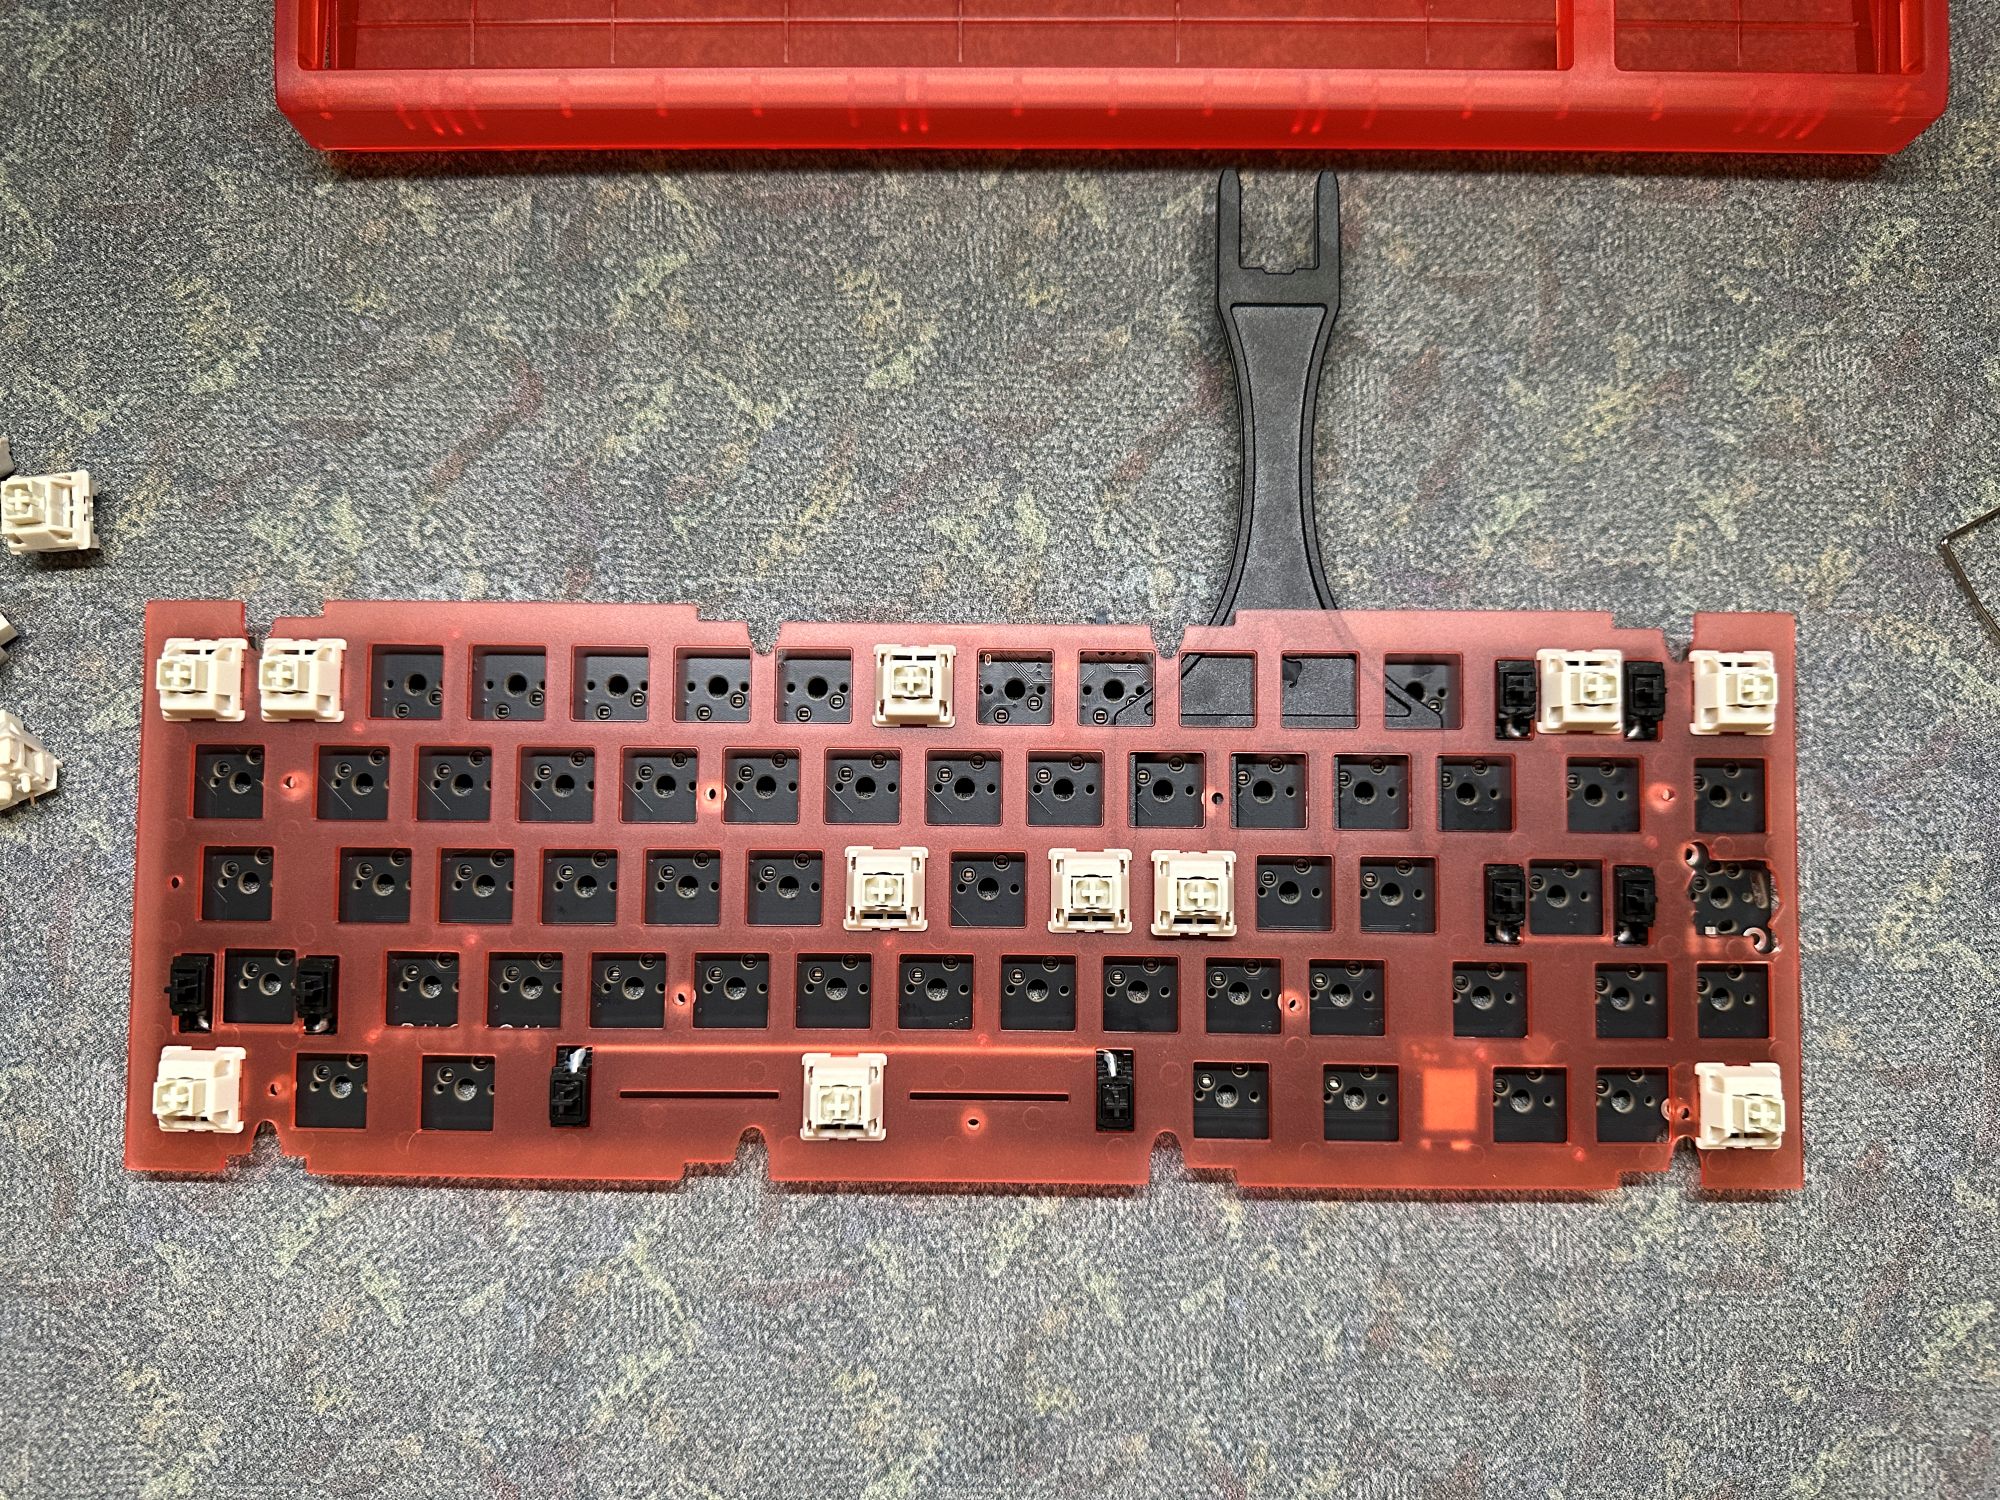
-
Line up the plate over the PCB, and start pushing the switches in one by one. Use the video below for a tip on doing this safely and smoothly.
-
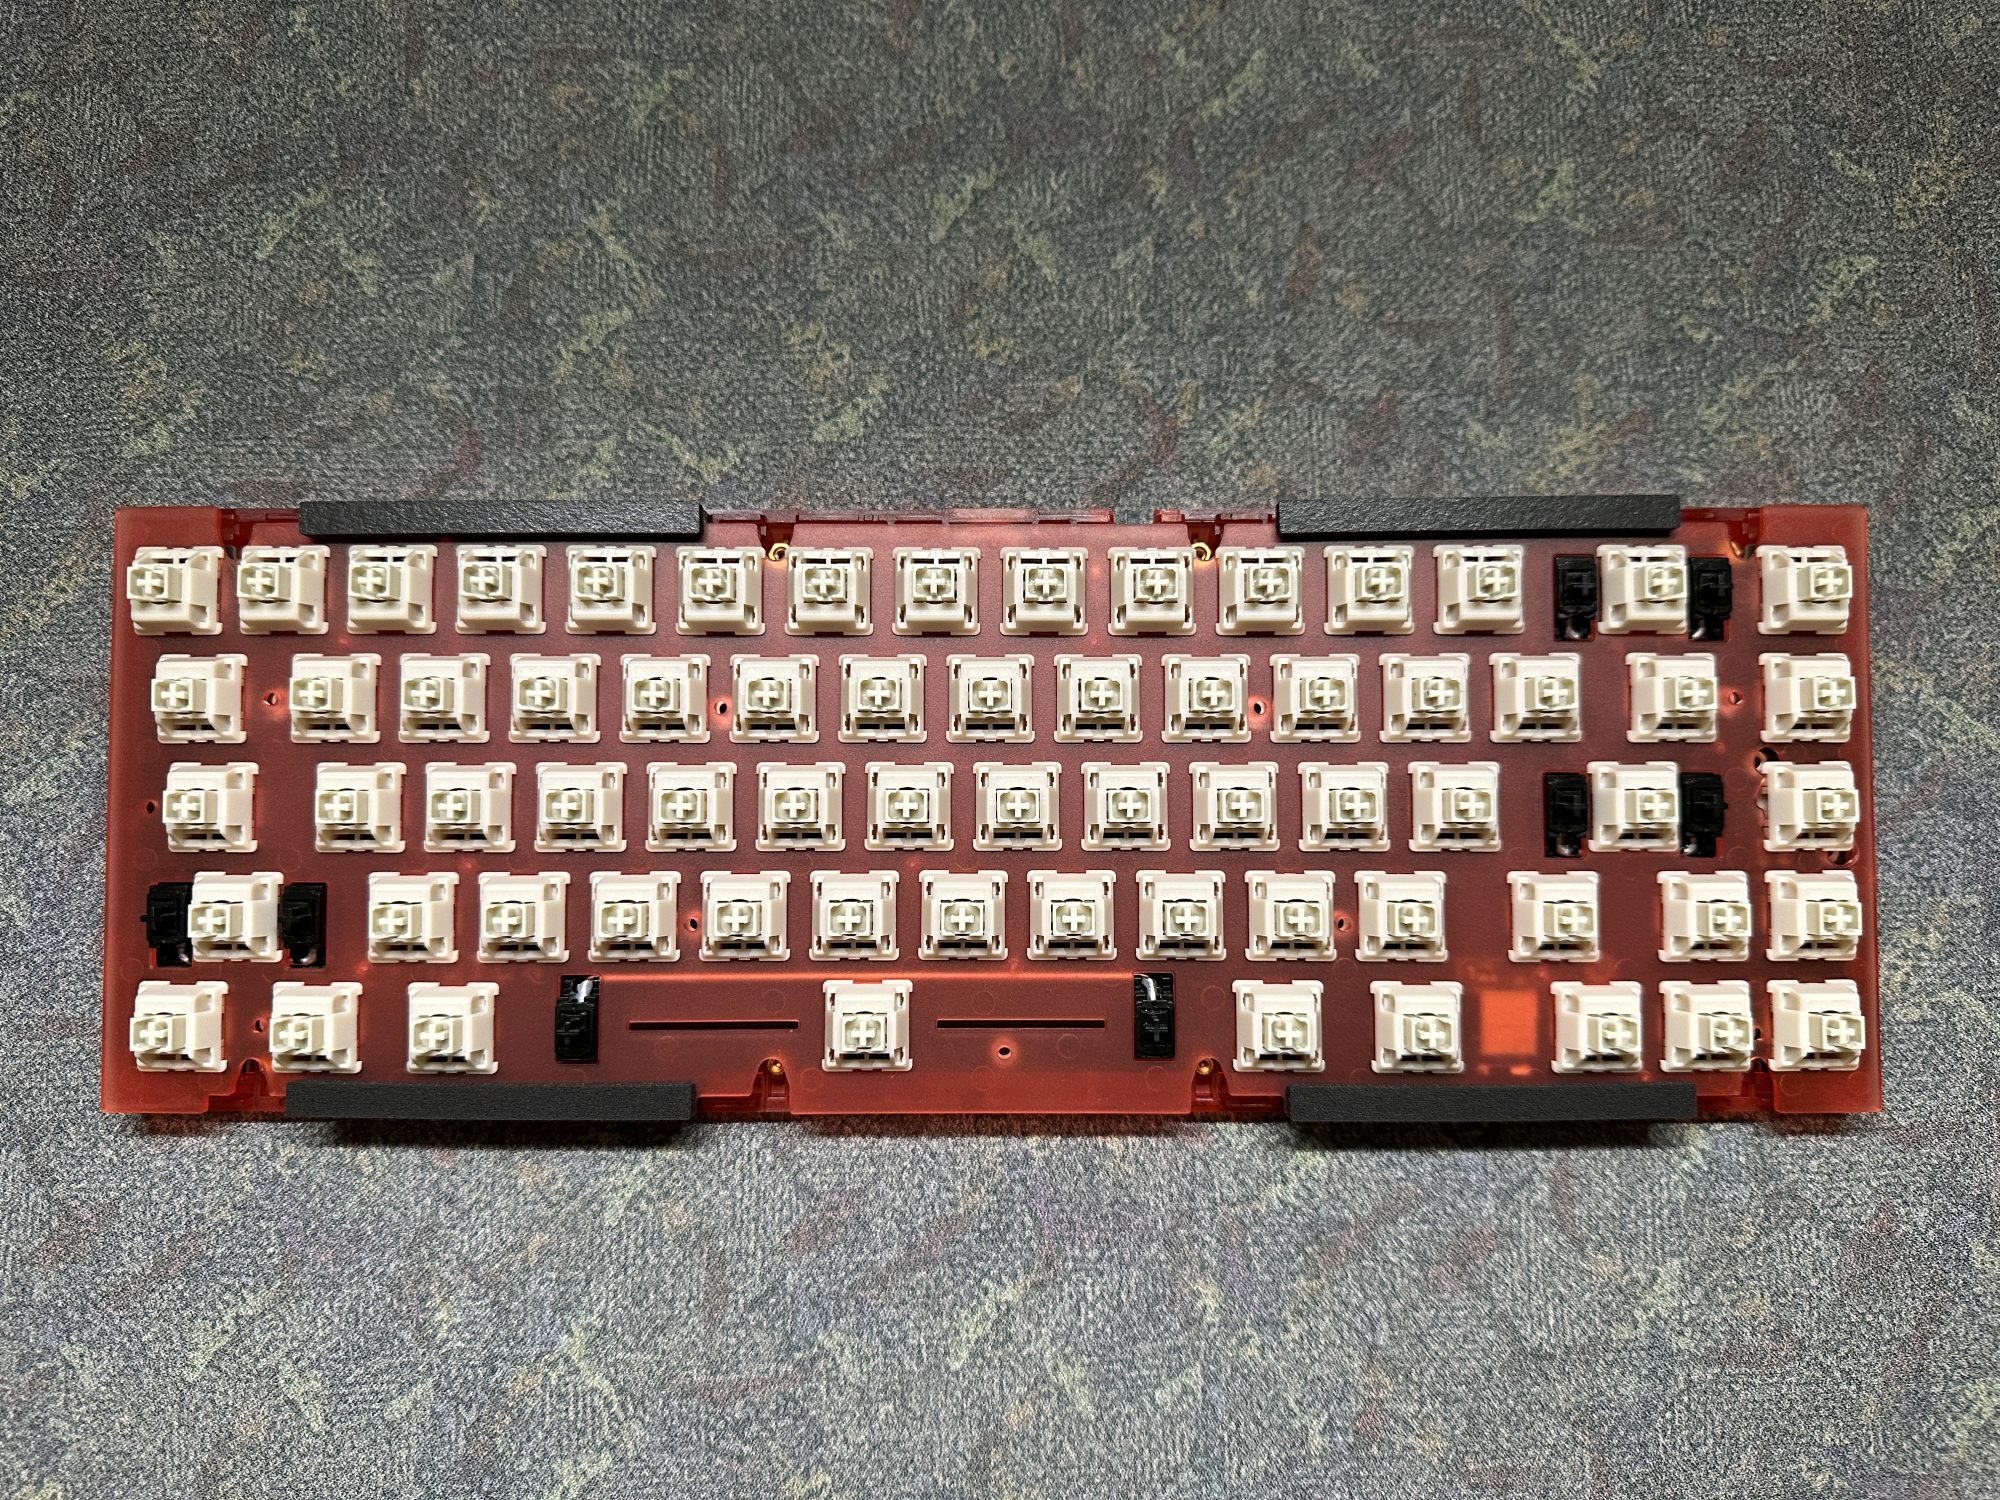
Next, finish up installing switches around the outside. With the outer ring complete, the rest of the switches should be easier to install! Before continuing on, check that there is an even gap between the plate and PCB around the entire assembly.
Note
We included a plate fork to assist with installing switches. Since PC plates have a bunch of flex, we recommend using the plate fork to help keep the plate properly aligned when inserting switches.
Case assembly
With the PCB and plate assembled, you are now ready for the final steps for your build. Grab your case, gaskets, and battery and continue on with the guide!
-
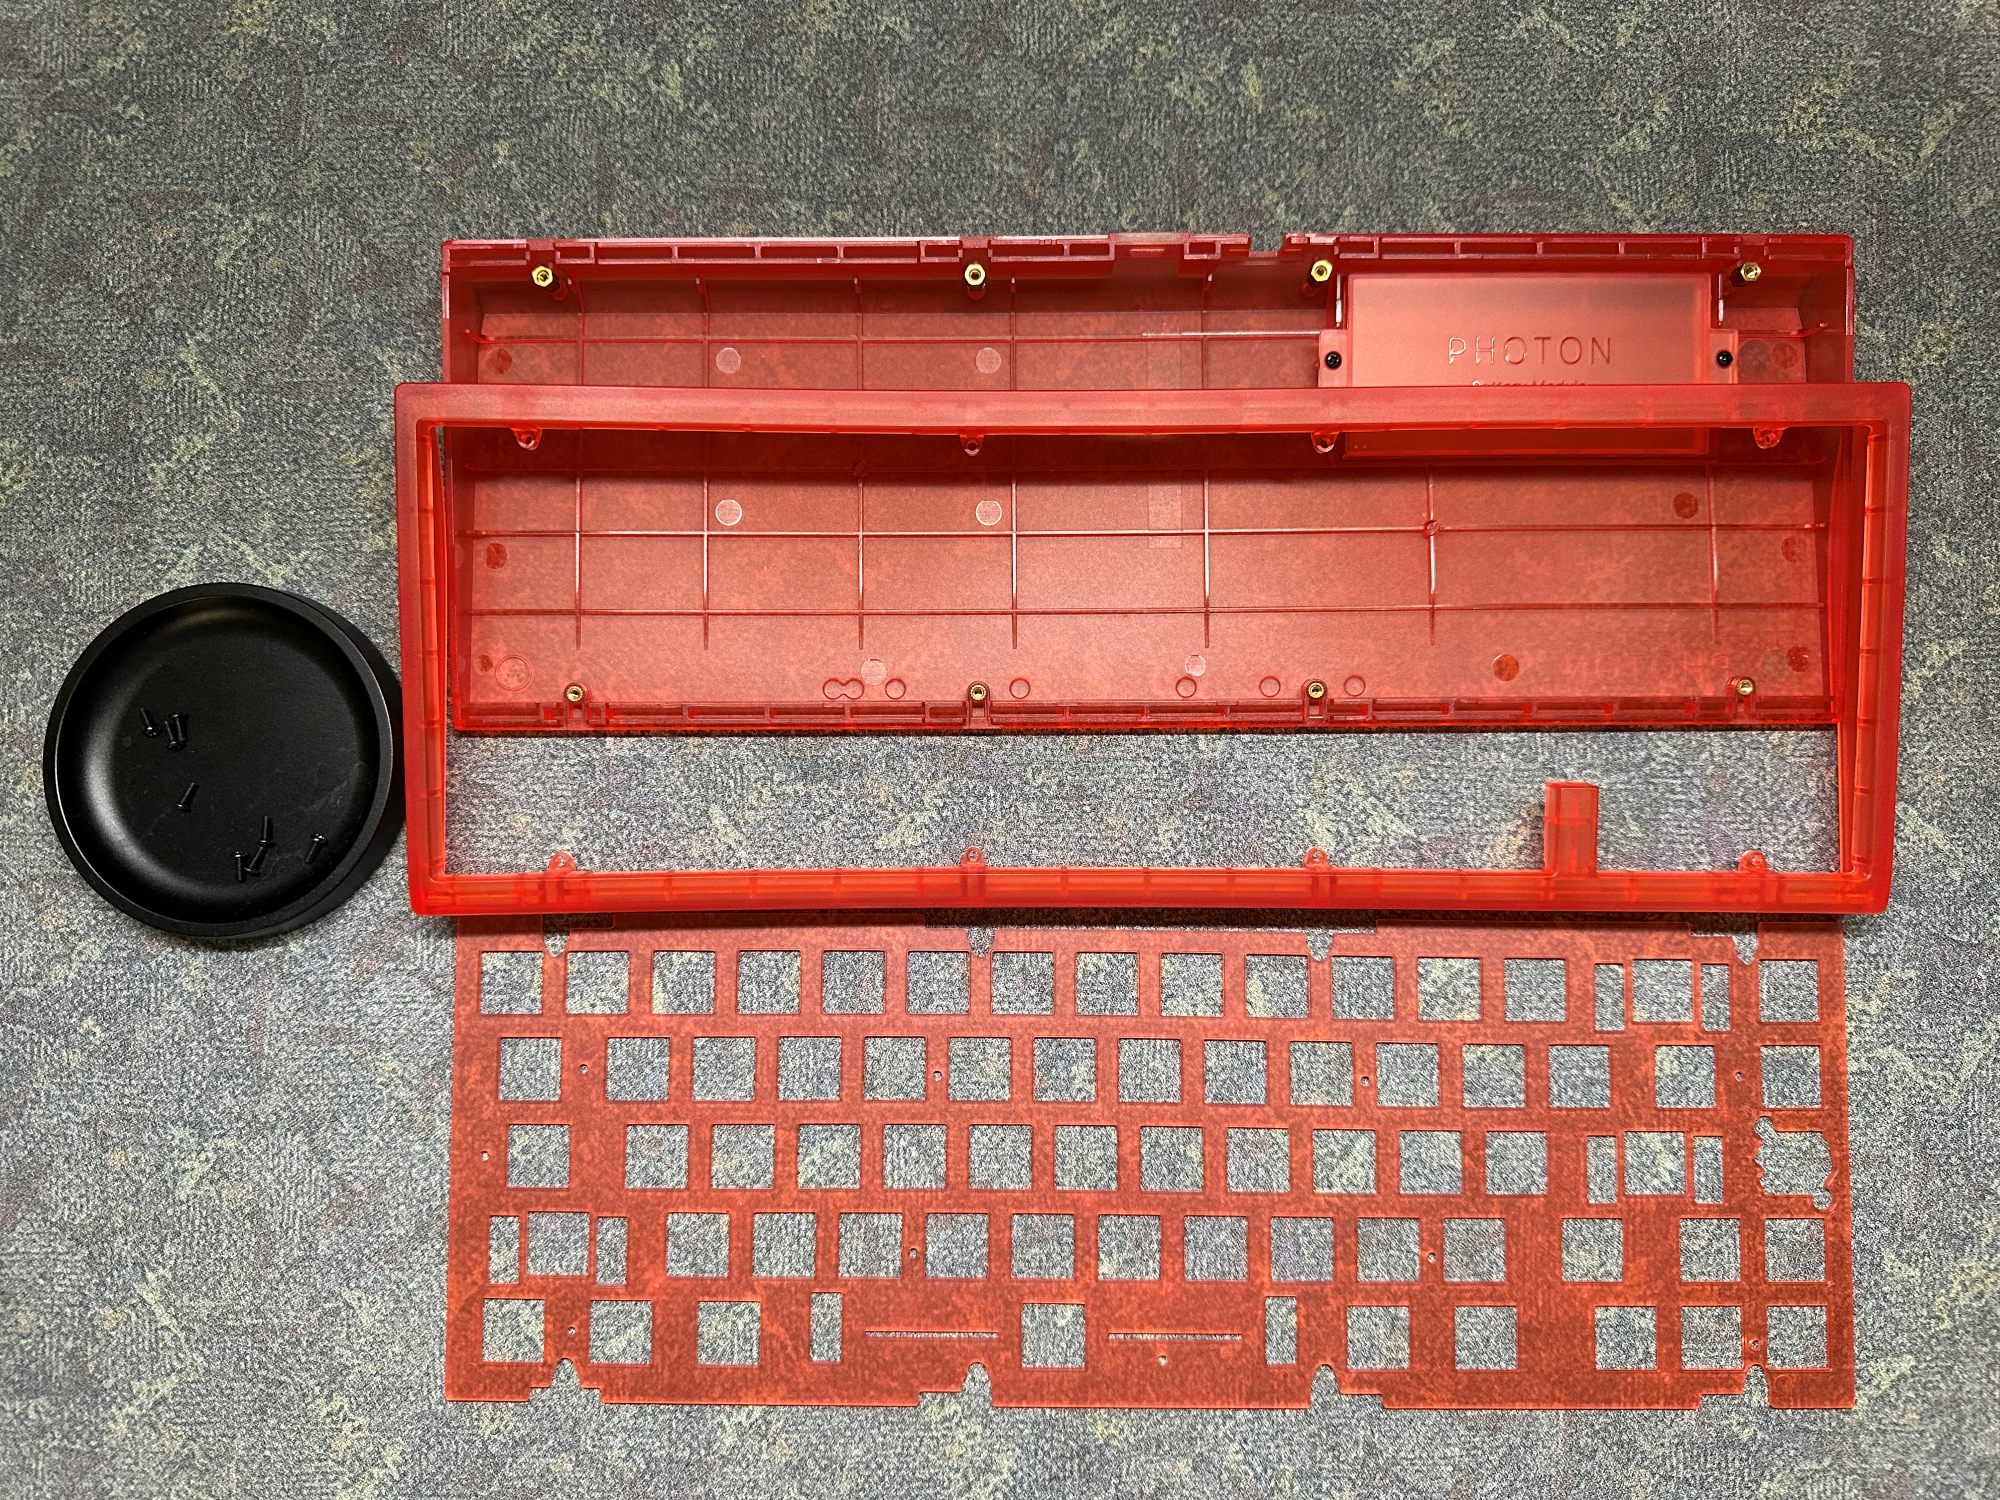
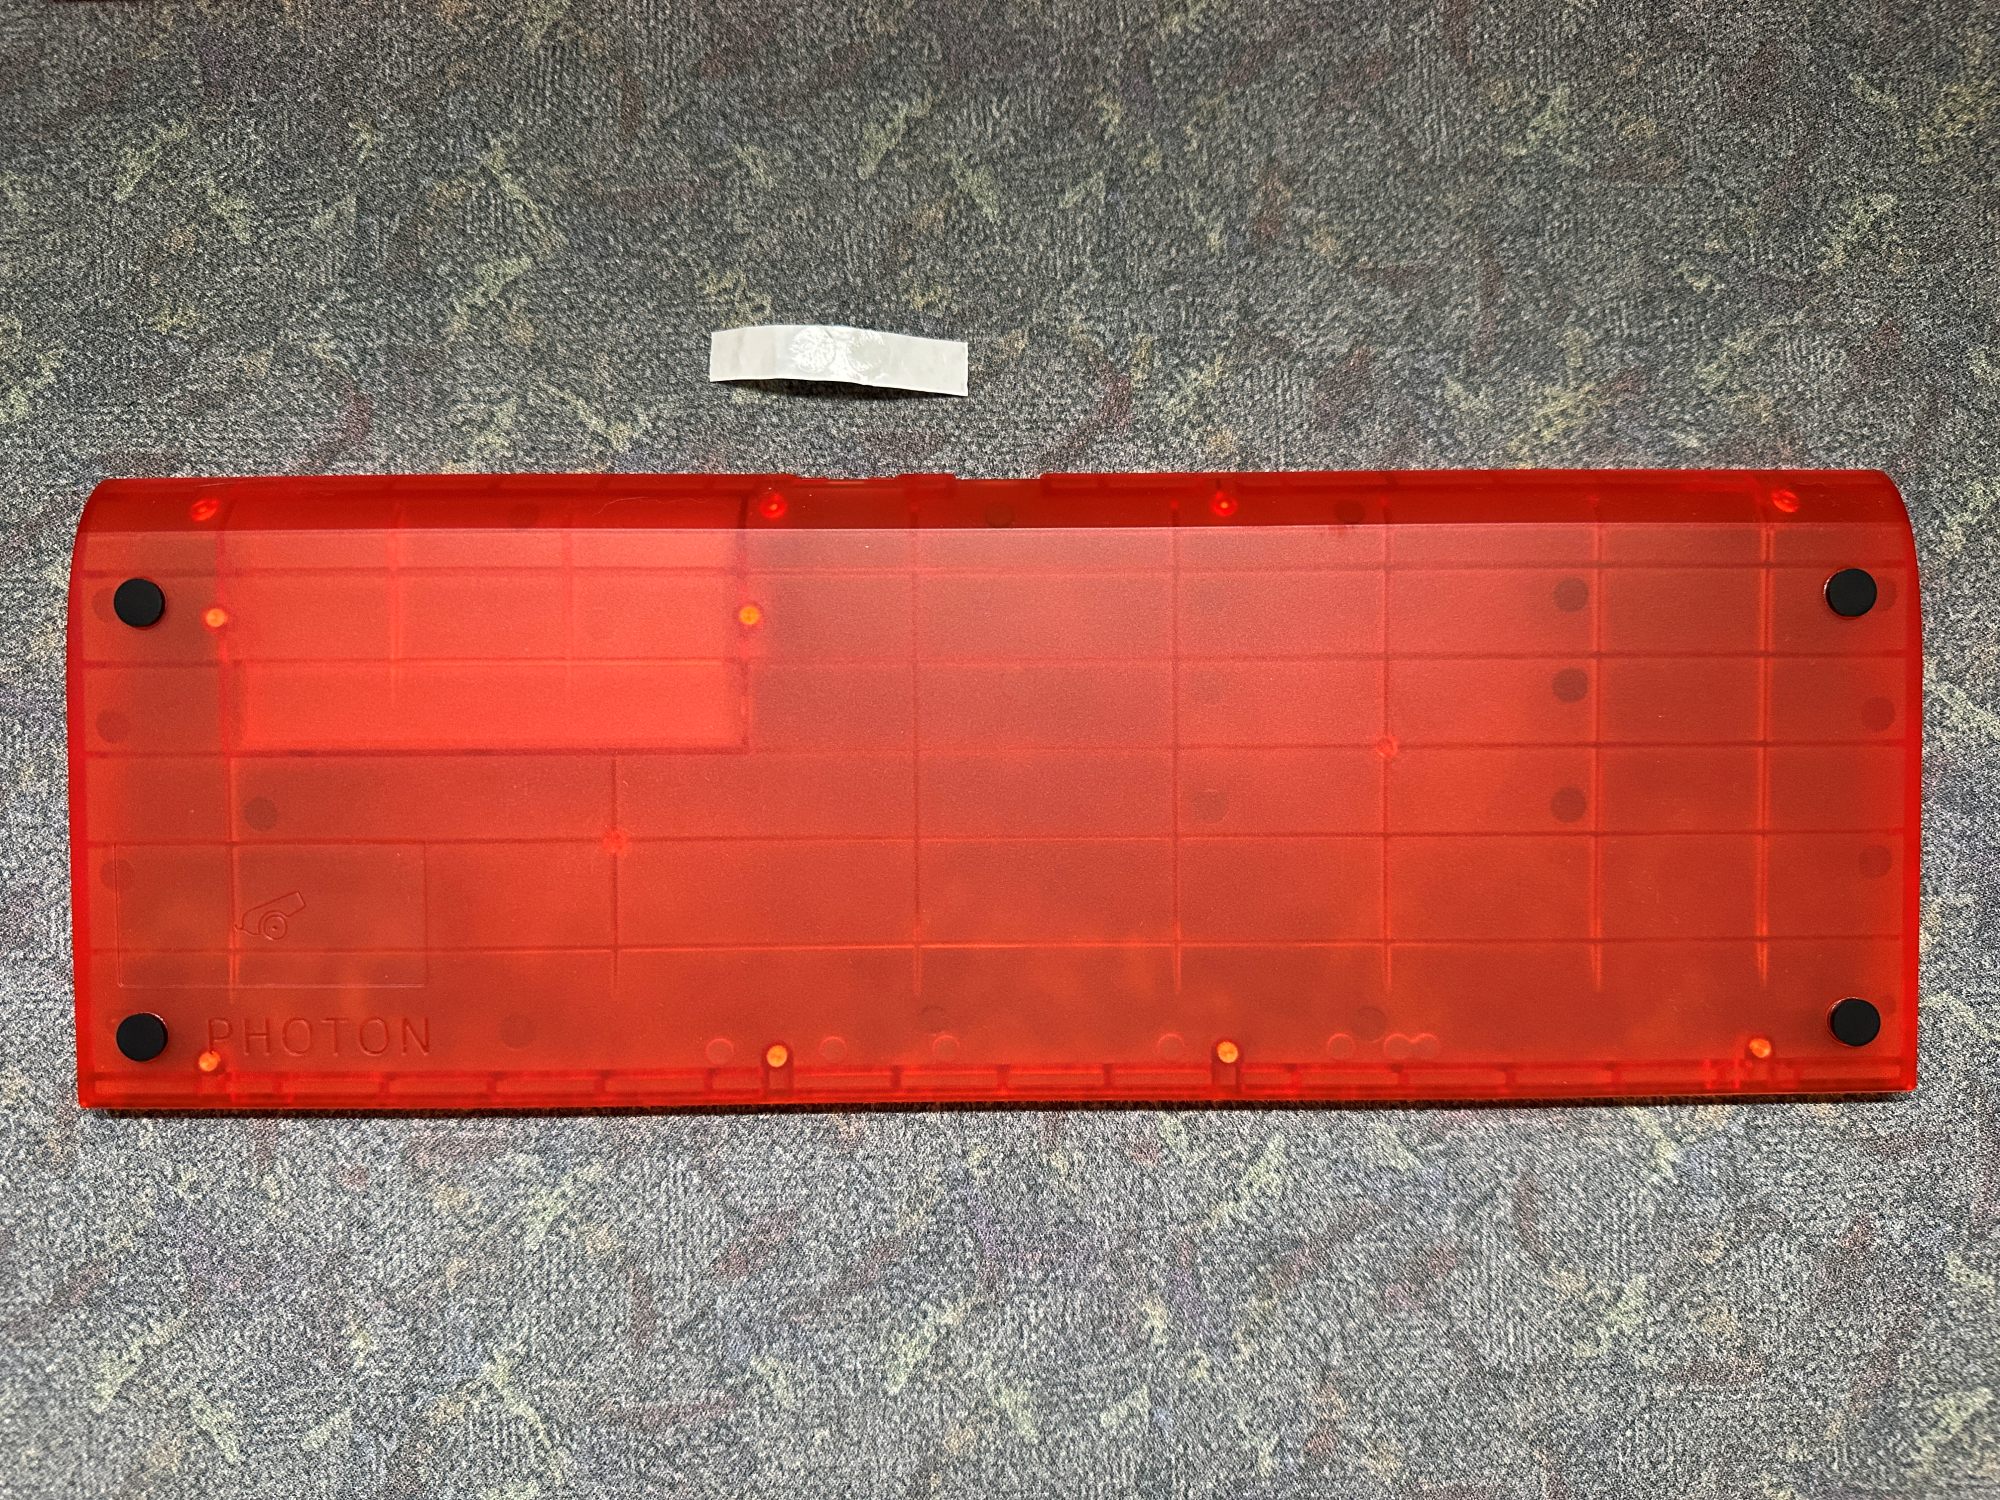
First, grab the bottom case, and install the feet found in the gasket baggie.
-
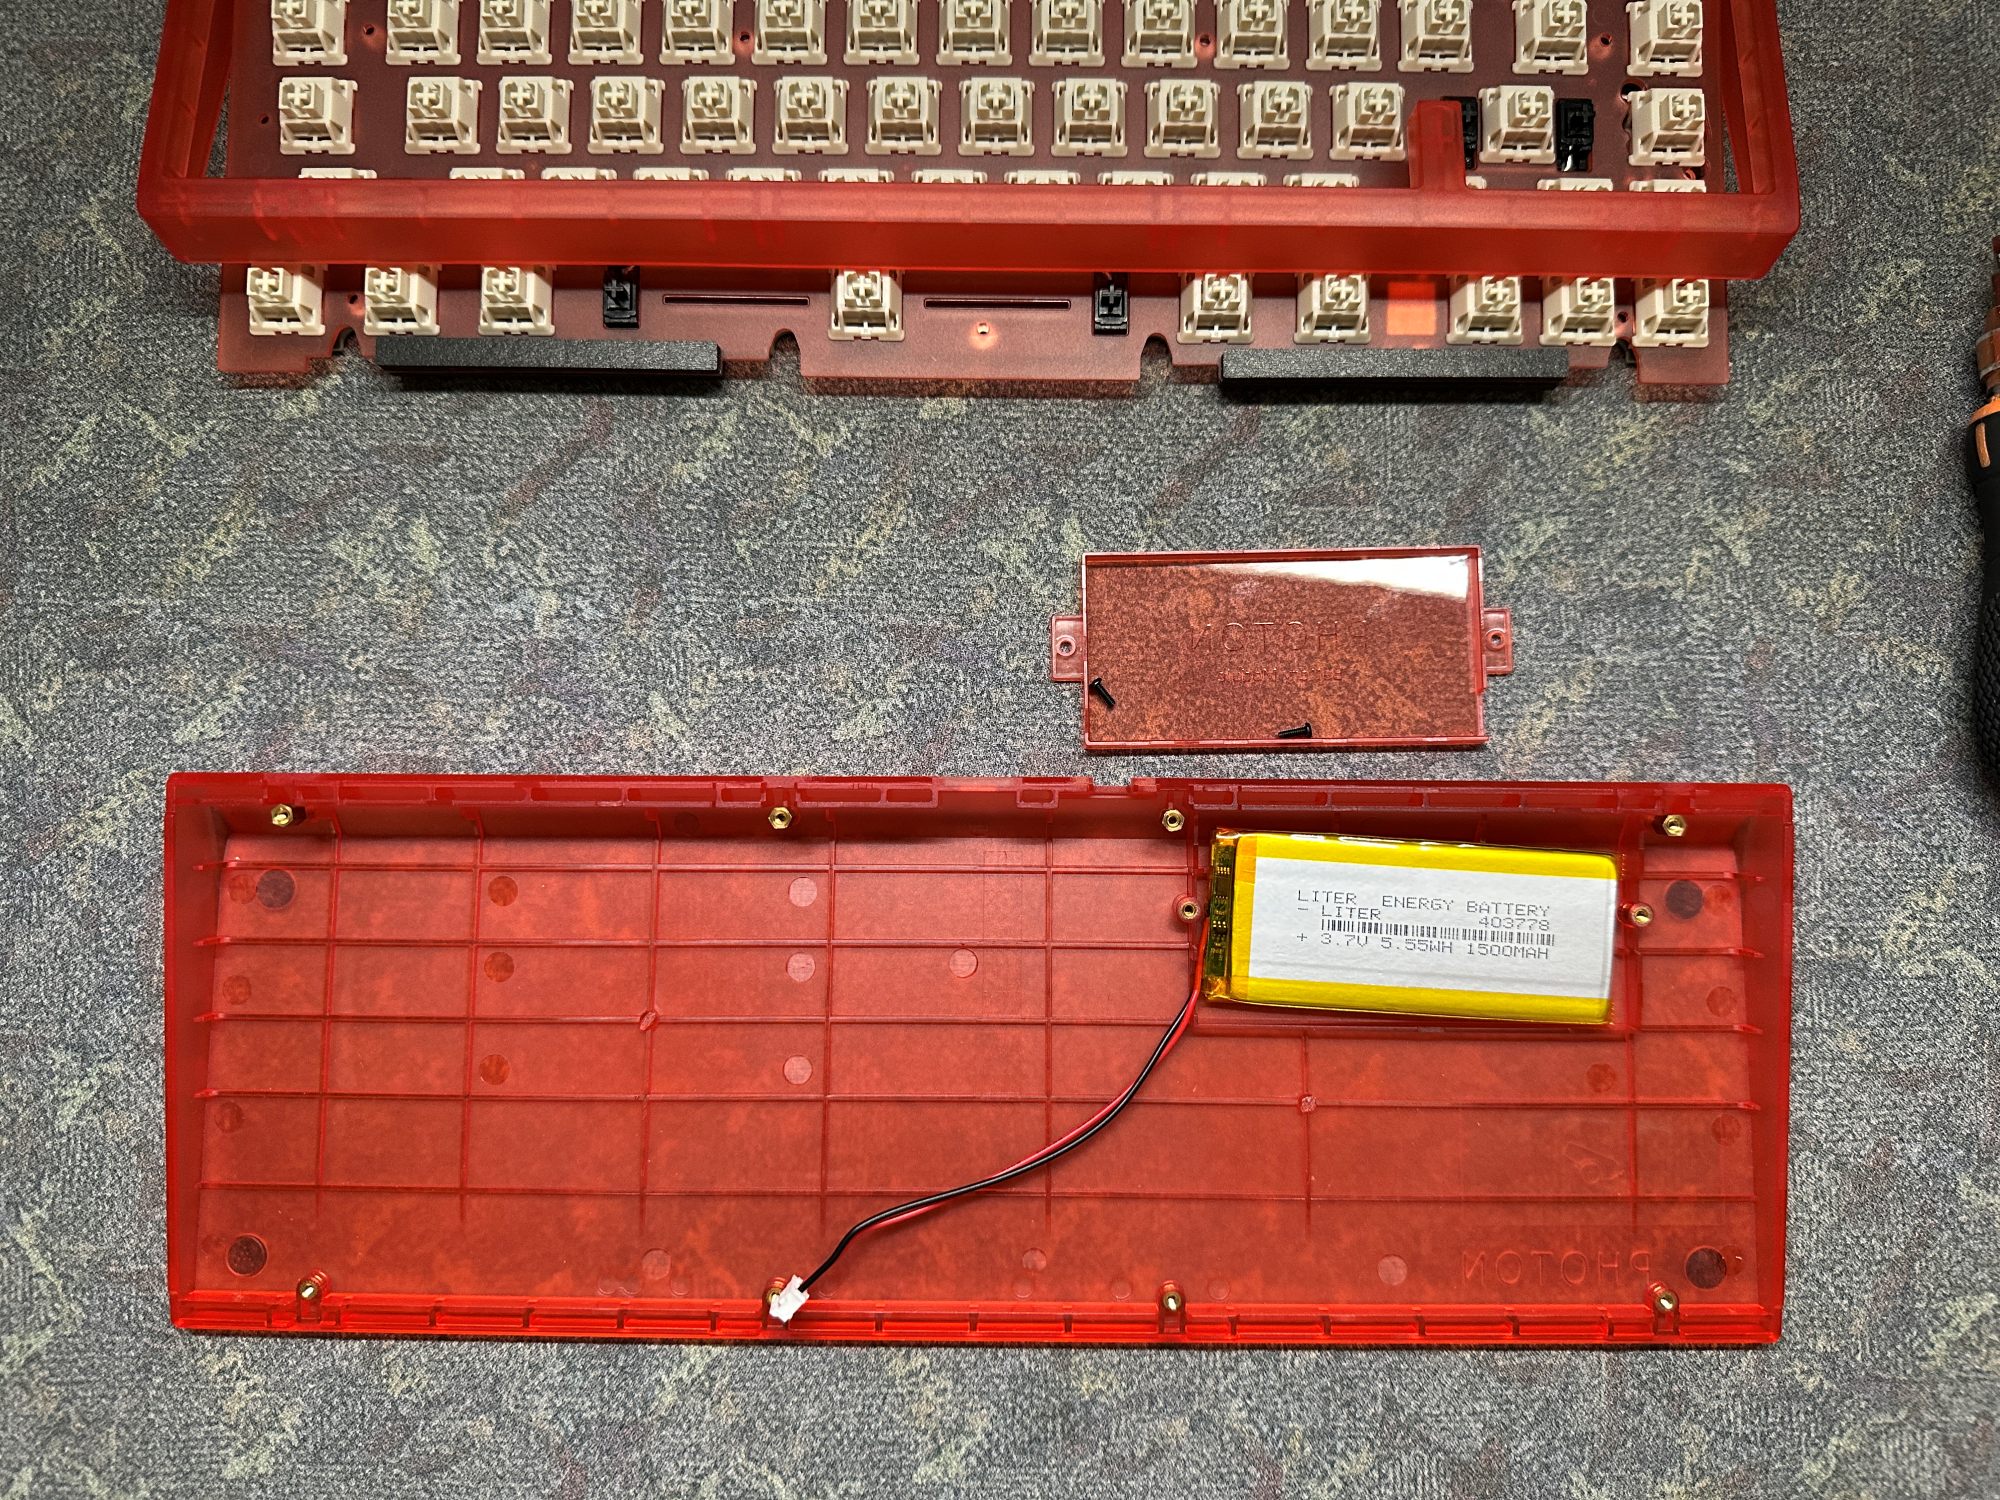
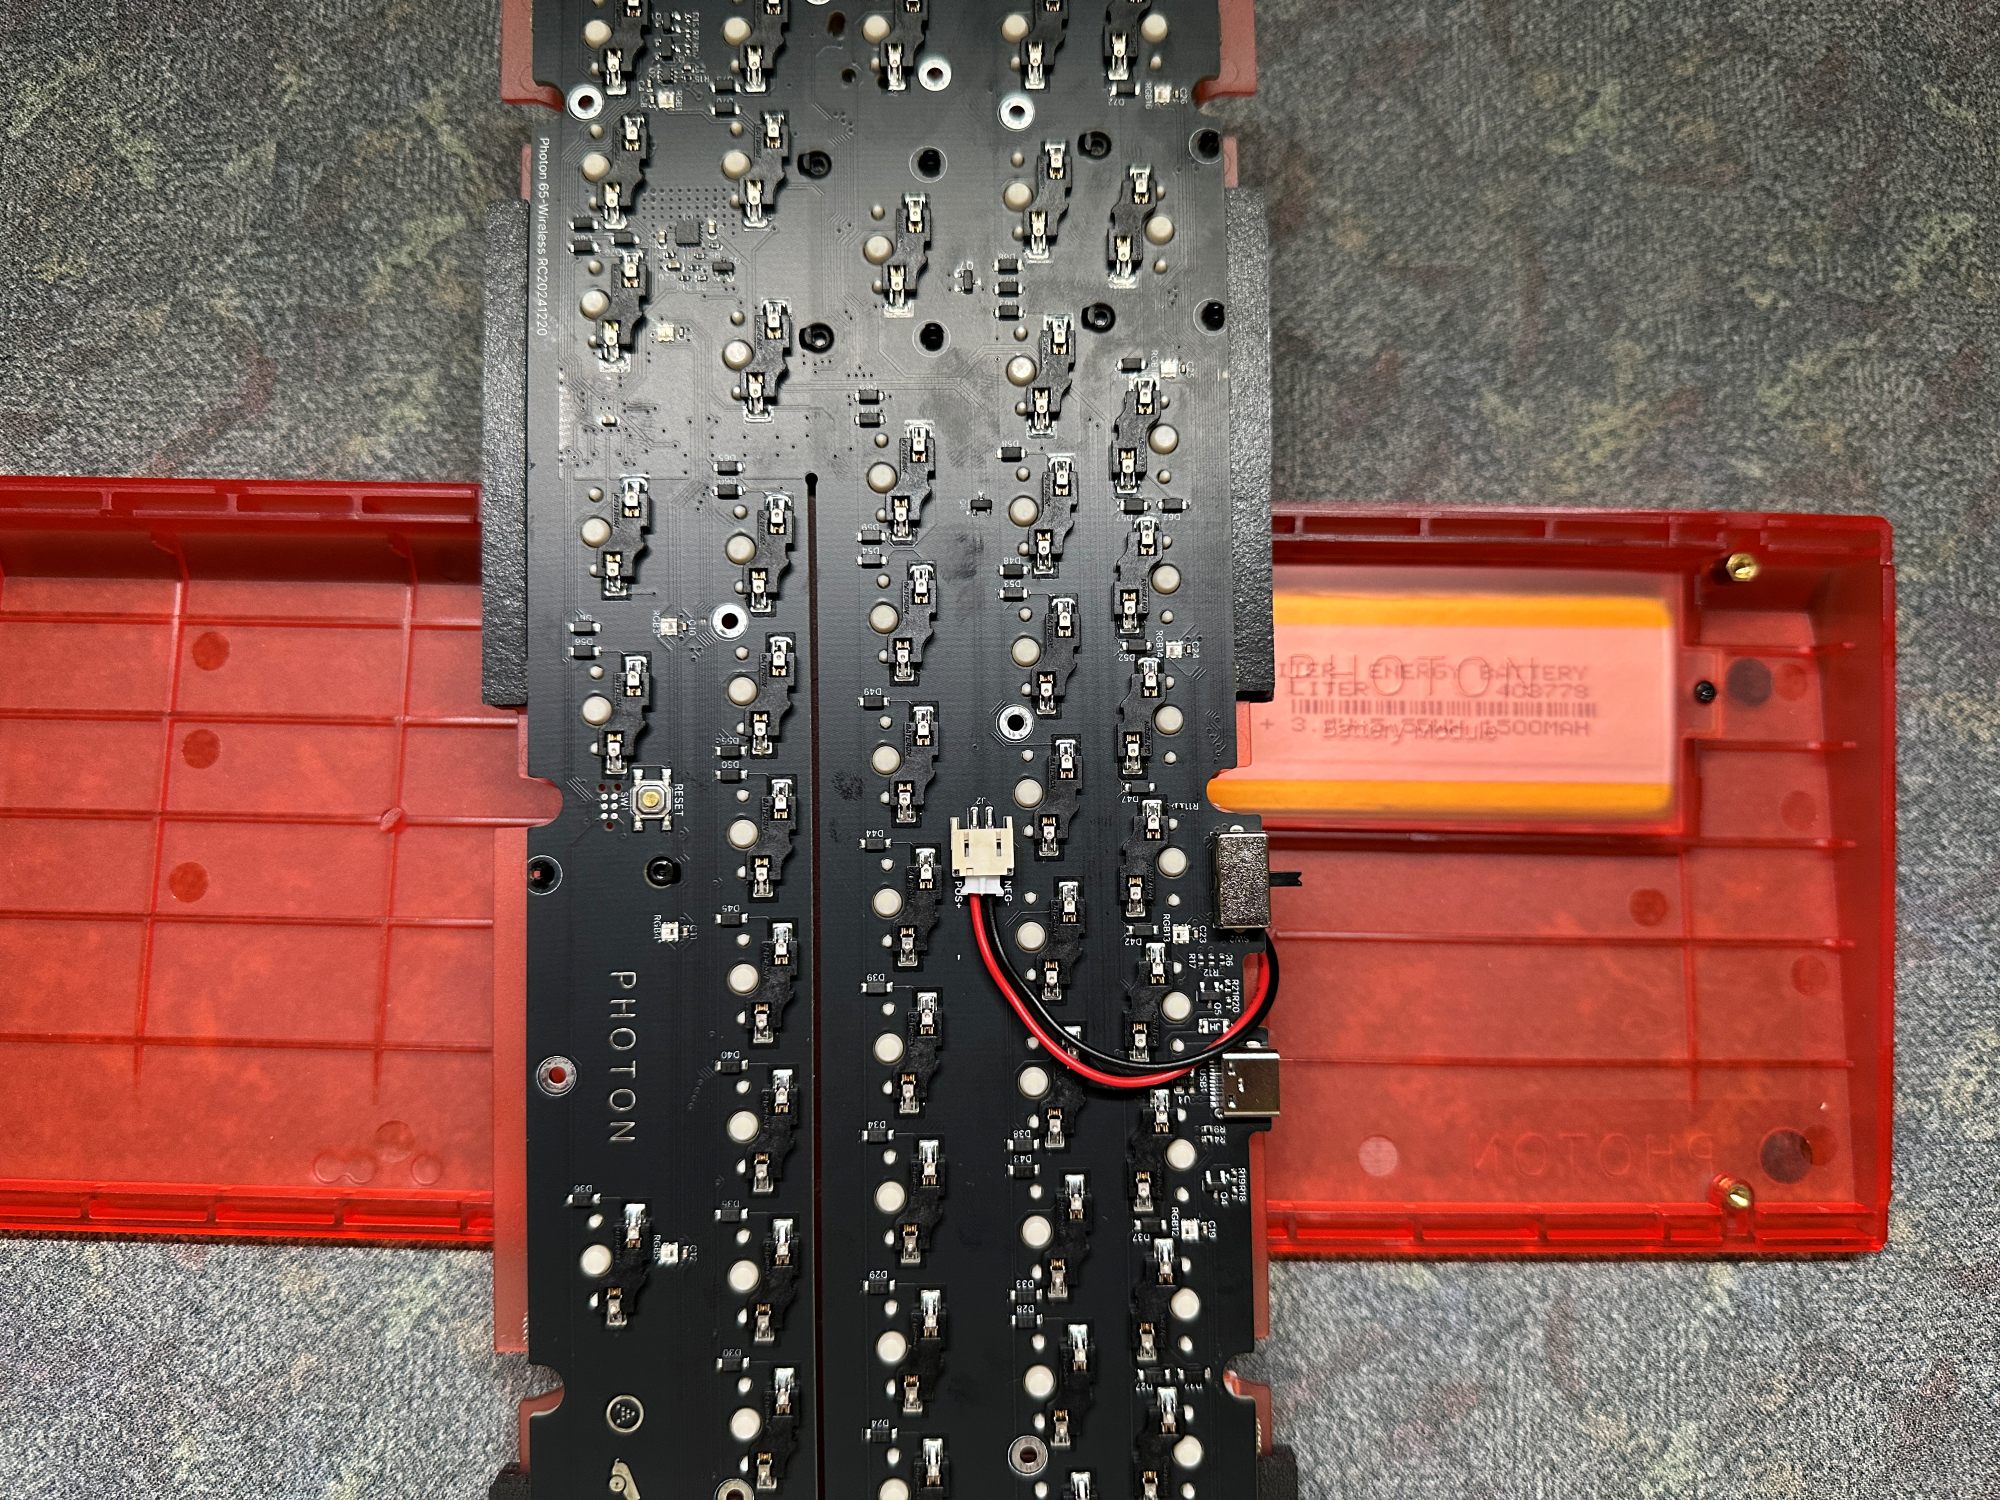
Next unscrew the battery cover, then insert the battery into position so that the wires can exit the holder where the side walls are lower.
-
Once the battery has been placed correctly, making sure the wires will not be pinched, put the cover back on and screw it in.
Note
If you're having trouble getting the battery properly installed, try putting it into the removable cover first instead, and then putting the cover + battery into the bottom case.
-
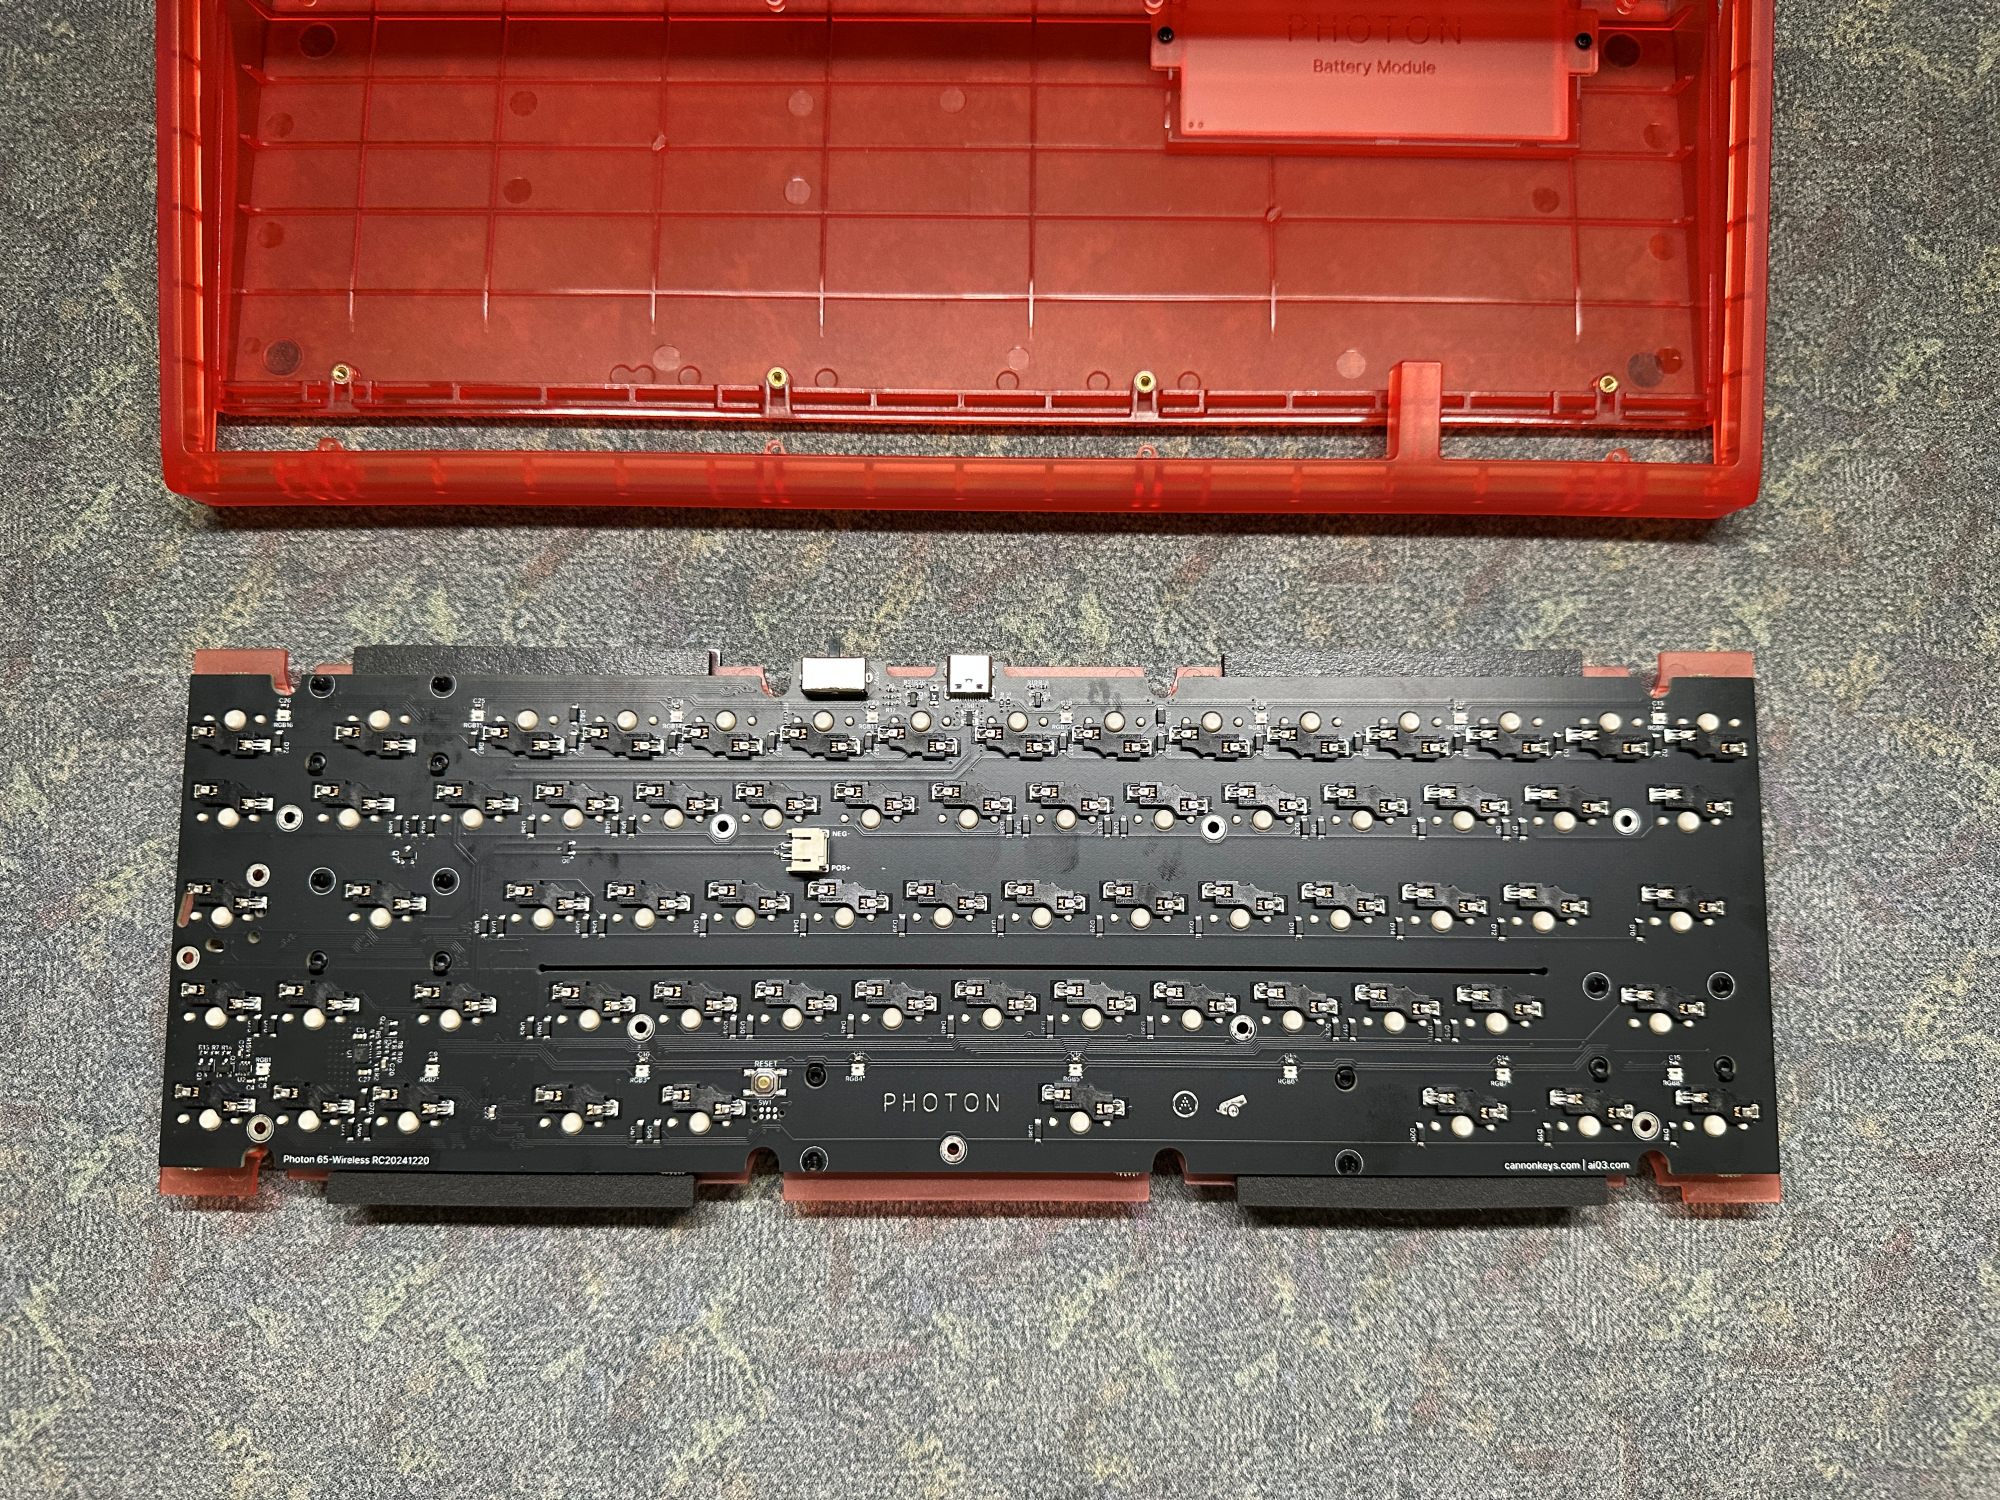
Grab your PCB + plate assembly, and the long gaskets from the baggie. Using the image below as a reference, install the long gaskets directly onto the top and bottom side of the plate.
Note
The below image is our recommended setup for gaskets. You can experiment on your own if you wish by installing in different locations, or even directly onto the case rather than onto the plate.
-
With the gaskets installed, flip over the PCB and carefully install the battery cable into the header located on the PCB. The red wire should be aligned with the POS+ pin.
-
Carefully flip over the PCB so the switches are facing up, and install the PCB + plate into the bottom case. Put a little pressure on it once aligned to make sure it is fully seated.
-
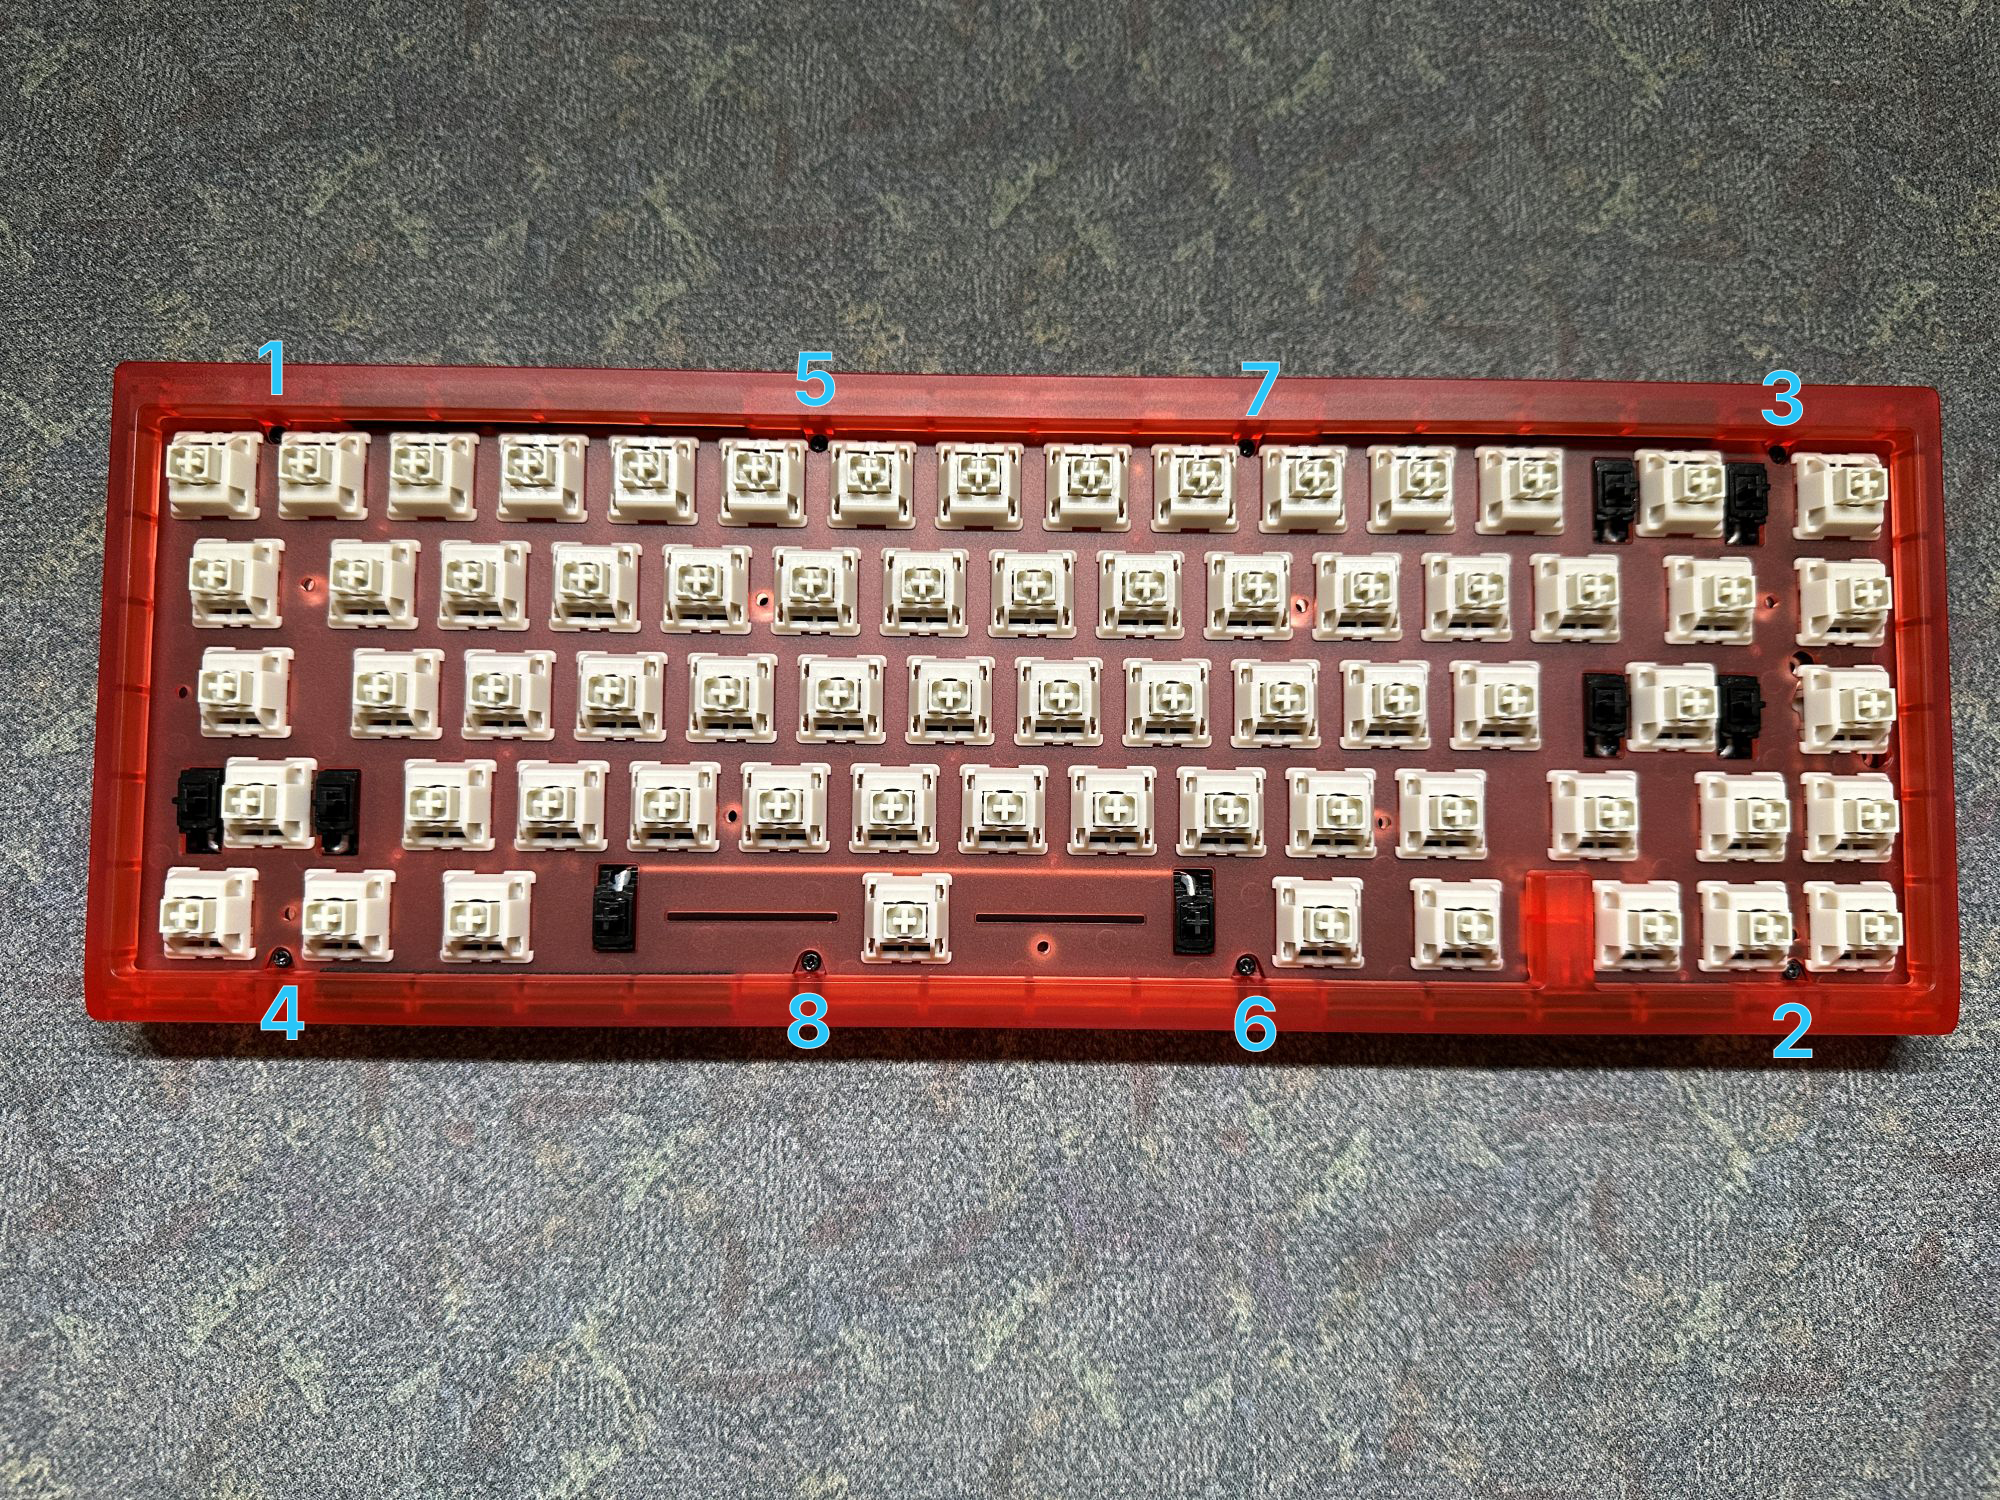
Put the top case onto the keyboard, and install the screws. You might need to put a little pressure on the top case for the first couple screws to compress the gaskets. We recommend stopping the screw once you start to feel a little resistance, and installing them in a crisscross pattern as seen in the image below to help ensure even compression.
-
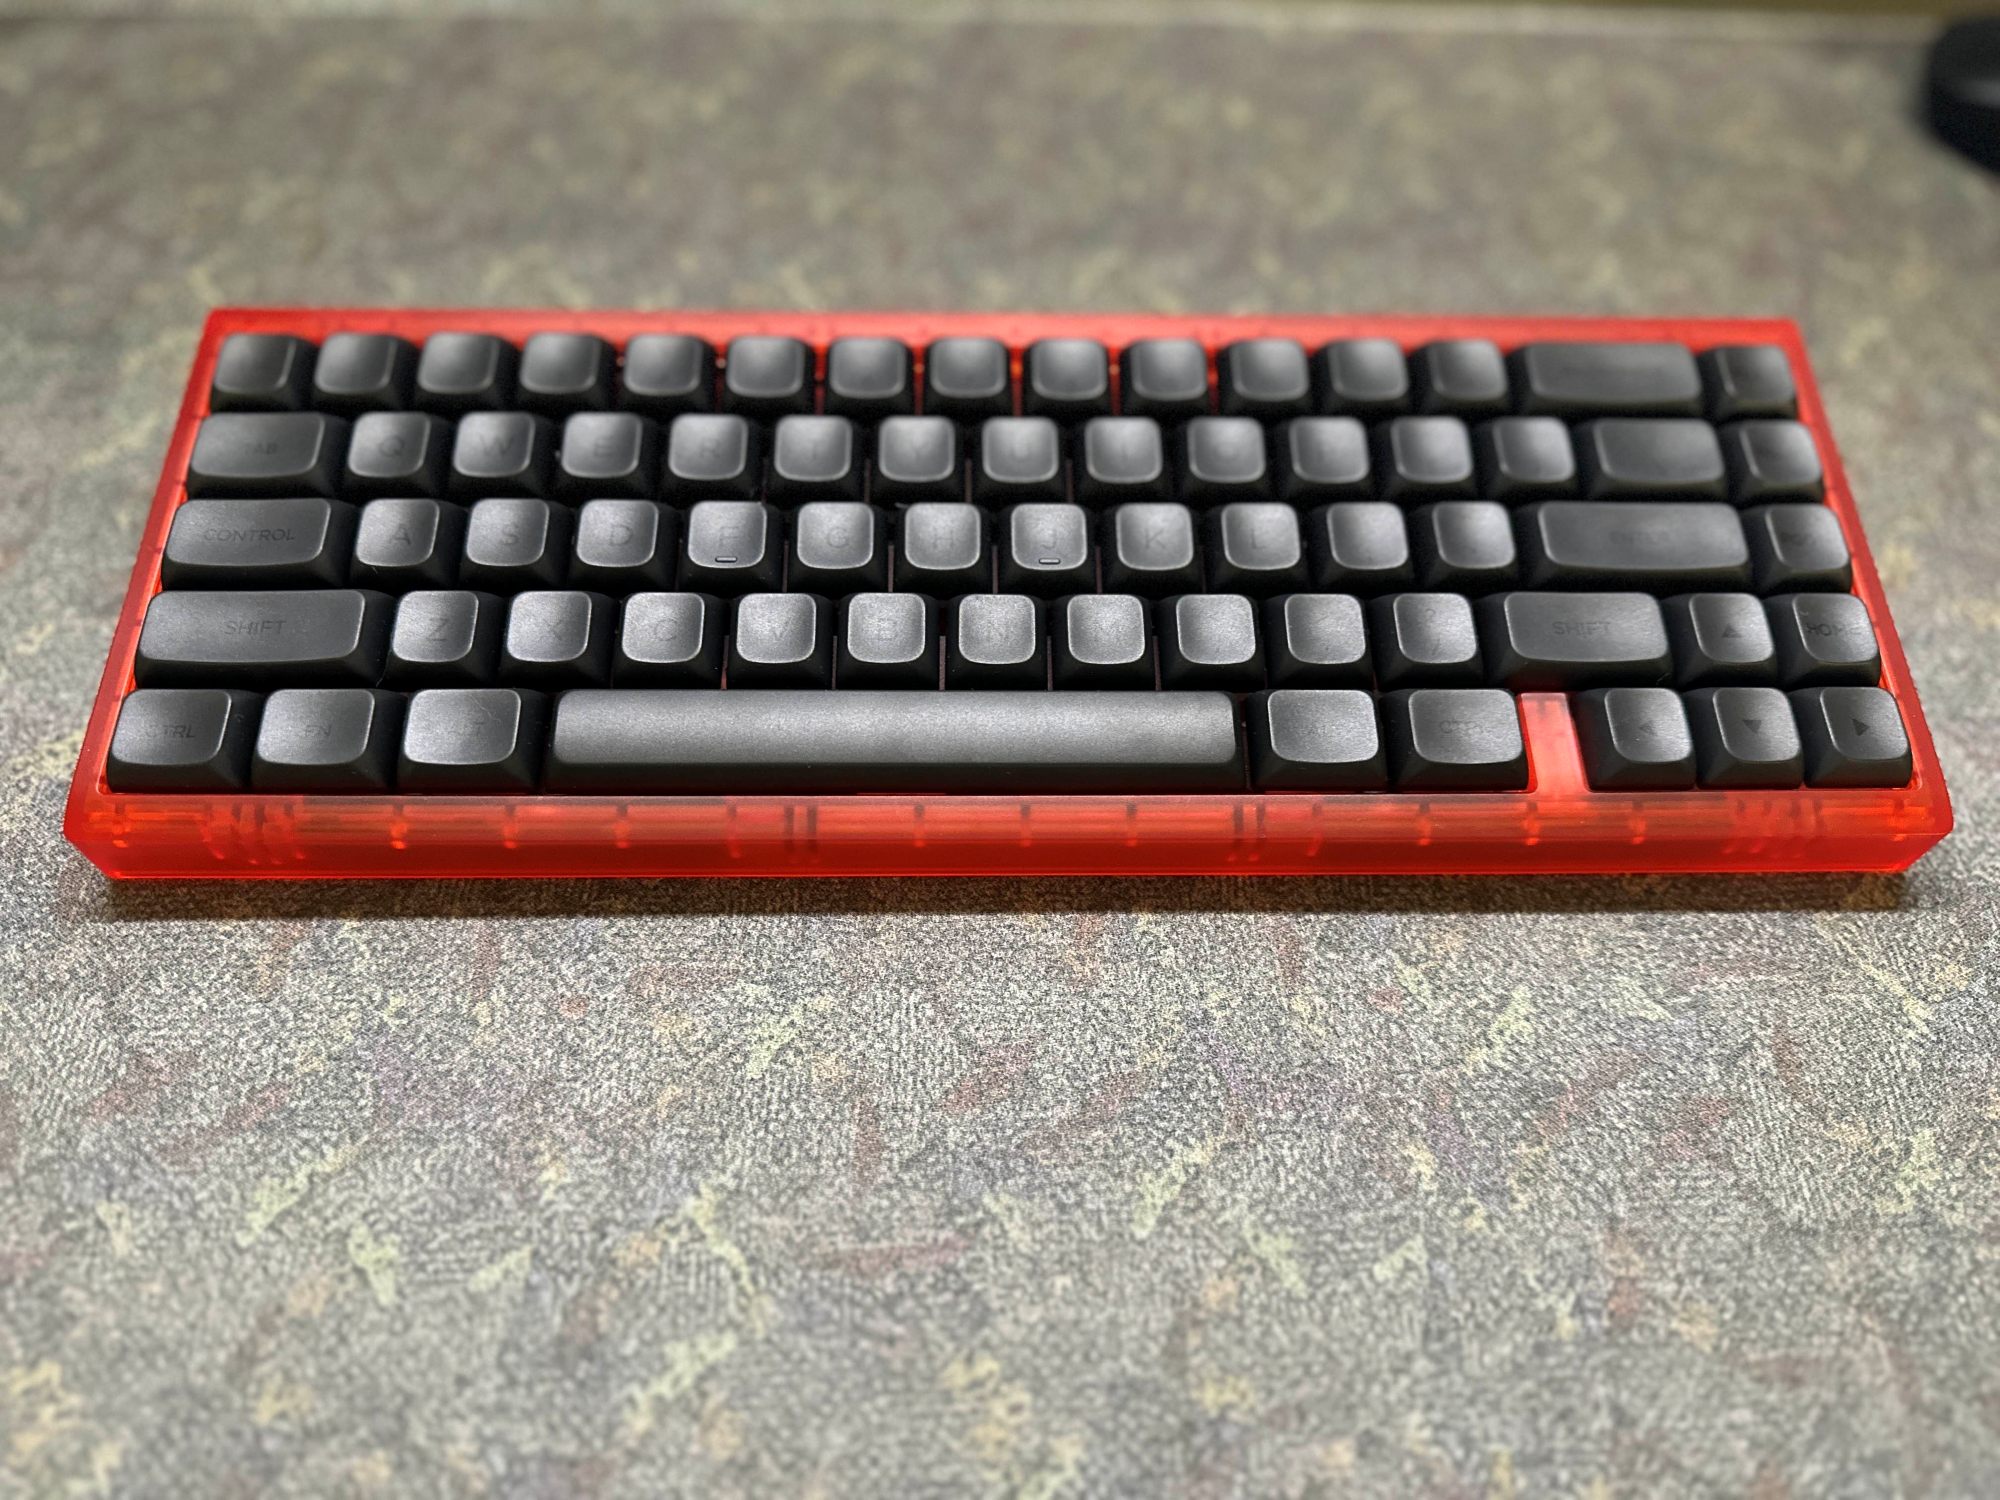
Finally, put your keycaps on the board, and enjoy your new Photon!
Additional information
Your build is done- now what? Below we'll compile some useful information as well as some other things you can do to further customize your build.
FAQ
- Q) The keymap on my Photon is incorrect or acting funny after building it, how do I fix?
- A) Please follow the quick guide in the flashing section of the user guide for instructions on how to flash the latest firmware.
- Q) I am unable to connect to ZMK Studio even after inputting the unlocking keybind, how do I connect?
- A) Please follow the quick guide in the flashing section of the user guide for instructions on how to flash the latest firmware.
- Q) My knob is not working correctly, how do I get it working?
- A) Please follow the quick guide in the flashing section of the user guide for instructions on how to flash the latest firmware.
- Q) What is the knob bound to/control?
- A) By default, the knob turns volume down when turned left, volume up when turned right, and mutes when pressed in. To customize further, you will need to compile your own firmware using our ZMK Module on GitHub.
User Guide
For information on how to use the wireless BT functionality and toggle switch for Windows and Mac modes, check out the Photon user guide.
Keymap customization and rebinding
Photon is compatible out of the box with ZMK Studio. We recommend using the ZMK Studio online configurator to remap your keys. This requires your keyboard to be plugged in. To learn more about the layers, and how to unlock ZMK Studio or change BT devices, check out the default keymap below.
Default keymap
Not seeing what you're looking for?
Not to worry! While we do have a community on Discord, if you are running into issues with your build we recommend contacting our official support team through the widget on the contact us page of our website.